 We call this Almost Instant Fudge because it's really quick to make and has just two ingredients - yes, just two ingredients.
To present this as a gift I like to repurpose a gift box or a pretty jar. Just recently I picked up Moccona jars for 50 cents each from the op shop, and they are perfect for packaging treats, including fudge and even Grandma's Shortbread Almost Instant Fudge Ingredients: 2 packets choc melts 1 tin condensed milk Method: Combine the choc melts and the condensed milk in a microwave safe bowl. Cook on HIGH in 30 second bursts, stirring between each burst, until the chocolate has melted and is completely mixed into the condensed milk. Pour into a well buttered 20cm square pan. Let set about 10 minutes, then carefully mark into squares. Place in the fridge to set completely. You can add chopped nuts or dried fruit to the fudge after cooking. You can also trim the cost by using MOO Condensed Milk. I buy choc melts on sale all year round and keep them in the freezer ready to use.
0 Comments
This hamper comes complete with the ingredients for MOO Pancake Syrup, MOO Hotcakes and the tip sheets with full recipes in a neat gift hamper making it portable, the ideal gift for the family heading off on holidays.
Cheapskates Hotcakes Hamper You will need: Mum's Secret Hotcakes & Moo Pancake Syrup Tip Sheet Large paper lunch bags 2 x ziplock sandwich bags 1 x 250ml glass bottle with a leak-proof stopper (an old mint sauce bottle is good) 2 cups SR flour 1/4 cup milk powder (skim or full cream) 2 tsp sugar 2 cups brown sugar 1 tsp vanilla sugar Optional - cast iron pancake pan - from specialty stores, around $5 Instructions: Print the tip sheets. Mix the SR flour, powdered milk and sugar together and put into a ziplock bag and label "Hotcake Mix". Place the brown sugar and vanilla sugar into another ziplock bag and label "Pancake Syrup Mix". Decorate the front of one paper bag with "Hotcake Mix" and another with "Pancake Syrup". Decorate a third paper bag with the words "Cheapskates Hotcakes Hamper". Place the hotcake mix and the pancake mix into this bag along with the small glass bottle. Fold the tip sheet and slip into the paper bag. Fold the top of the bag over and staple shut. Attach a gift tag.  MOO Butter
Ingredients: 600ml cream Pinch salt 1 cup ice cold water You will need: A stand mixer, hand mixer or food processor (all will work, the stand mixer and food processor are the easiest to use) A bowl A sieve or cheesecloth (I prefer the cheesecloth) First things first, get your cream. The higher the fat content, the more butter you'll get per litre of cream and the nicer the butter will be, so skip the reduced fat creams and go for a good pure cream, or thickened cream or a full fat whipping cream. Tip that cream into the bowl of your mixer. You can use a handheld mixer or a food processor - both will turn your cream into butter just as easily as the stand mixer. Turn the mixer to medium speed and leave it for about 4 - 5 minutes. You'll see the cream thicken, then start to curdle, then you'll notice that it is separating and there will be liquid in the bottom of the bowl. This is the buttermilk. Don't waste it, you can use it in baking in place of milk or water. The creamy, yellow "butter" will be in clumps around the sides of the bowl. Now you need to get the butter to form one clump and completely separate from the buttermilk. To do this you'll need about 1 cup of ice cold water. I usually put a cup of cold water in the freezer for about half an hour before I start butter making. Turn the mixer back on and very slowly pour in about a quarter cup of the ice cold water. You'll see all the butter will clump together and there will be even more buttermilk in the bottom of the bowl. Take a sieve and place it over a bowl. Tip the butter and the buttermilk into the sieve. Now, with clean hands, you need to pick up the clump of butter and gently squeeze. You'll see more buttermilk coming out. Keep squeezing gently, until you can't get any more buttermilk from the butter. The aim is to remove all the buttermilk as the more you can remove the better your butter will keep. Once you've squeezed all the buttermilk from the butter you're done. You have lovely, fresh, unsalted butter. To add a little flavour to the butter, stir through a pinch or two of salt. I use a fork to mash the salt into the butter. Put the butter in a dish and keep it in the fridge for up to eight weeks. Pour the buttermilk into a jug and it will keep for up to two weeks in the fridge And there you have it, fresh butter in 20 minutes. From the September 2017 Cheapskates Journal  I don't have strange ingredients in the back of the pantry. Or rather I don't have ingredients I don't use at the back of the pantry (some of the things I use may be a little strange to some folk). I tend to buy the same basic groceries over and over and over and just rearrange them into different recipes. It means my grocery bill rarely varies from month to month and is predictable, unless of course there is a price rise (drat those price rises). Wendy talked about using coconut milk in a recipe and finding it overpowering, so she gave it another go and that recipe failed the Family Approval Test too. In the end she donated the remaining can of coconut milk to a food drive. I use coconut cream in curry and satay and to make custard. My family likes coconut so it is a pantry staple in our home. Wendy's family isn't so keen on it and so it is an extra ingredient. Those strange ingredients in a recipe will depend on your taste, your budget and your daring as a cook. In the interests of keeping a happy family we try to have one new recipe a month. It may be a main meal or a side dish, it might be a cake or slice, sometimes it is a new jam, sauce or pickle. Everyone takes turns choosing the recipe from the dozens of recipe books on the shelf. Sometimes a new recipe is a hit and goes onto the regular recipe rotation; sometimes it is a dud and we all vow to never, ever try it again (like the infamous SALMON DISH - and yes the kids talk about it in capitals, they shudder at the very mention of it). If a new recipe uses an ingredient that's not in the pantry I try to find a substitute I already have. If I don't have a substitute and I really want to try the recipe I buy the smallest size I can to try it. Then if we like it and it's an ingredient I can use in other things I'll look for the cheapest way to buy it. Here's a list of substitutes you can use when you find you don't have all the ingredients you need for a recipe.
 As I was whizzing through the checkout at my local supermarket recently I was astounded to hear the fellow on the checkout telling the lady in front of me that she must have the cleanest house around because she had so many different cleaning products in her trolley. She had a multi-purpose spray, window cleaner, a gel cleaner, another gel bathroom cleaner, a bleach, a box of washing powder, a spray bottle of ironing aid, a spray can of furniture polish, a shower cleaner and two bottles of toilet cleaners. Brother what a load of money she was about to pour down the drain! I couldn't help myself and joined the conversation when it became a "but I have to have them or I just can't keep the house clean" talk. I politely pointed out that a bottle of vinegar, a box of bicarb, a jar of borax, a bar of soap and perhaps a little elbow grease would do the same job as all these cleaners for a fraction of the price and damage to the environment. I was very excited when she decided I was right and she didn't want all those cleaners. I did feel a little sorry for the people behind us as she had them taken off her bill, but I was so proud of her, especially when she said she already had everything she needed to clean the Cheapskates way in her cleaning cupboard. This experience had me thinking: just how many of us have never tried to clean using cheaper alternatives because we didn't know there were any or we weren't sure how to use them? You can make your own household cleaners easily and best of all cheaply using these tried and true recipes. As well as saving you money, these cleaners will save you time and effort and rid your home of some nasty chemicals too. If you were to make all the recipes below you would have a cleaning solution for just about every household cleaning problem for the grand total of $6.72! If you were to add the equivalent of these products to your shopping trolley you would add another $44.50 to your grocery bill. By making them yourself you are saving around $37.80! What an incredible saving! By keeping some very inexpensive and basic supplies in your cleaning cupboard you can clean your whole house for just a few cents rather than hundreds of dollars. Bi-carbonate Soda (bi-carb or baking soda) – is a powerful cleaning agent on its own, even more powerful when combined with other materials. Borax - found in the cleaning aisle, usually next to the Drano. I use Harpers, in a white tub with a red lid. It's usually on the bottom shelf. Vinegar – is made from fermented apples, grapes, sugar cane, malt or wine. It is an acid and a mild disinfectant. Washing Soda – buy it in the supermarket under the brand name Lectric Soda. It is a good water softener. Eucalyptus Oil –can be bought at supermarkets, chemists, health food and hardware stores. Use eucalyptus oil to remove sticky residue, as an inhalant and a disinfectant or a cleaner. It is toxic, so keep it away from children and pets. It will also damage plants, so beware when using it in the garden. Window Cleaner Cost: $0.10 for 250ml extra strong window cleaner 1/2 tsp washing up detergent 3 tbsp vinegar 2 cups water 1 drop blue food colouring (optional) Blend well and store in spray bottle. Scouring Powder Cost: $1.89 for 600g scouring powder 1 cup bi-carb soda 1 cup borax 1 cup salt Blend and store in container. Furniture Polish This is so easy to make, and it works! Cost: $1.13 for 375ml furniture polish 1 cup vegetable oil 1/2 cup lemon juice Pour oil and lemon juice into a squirt bottle or jar. Stir to combine. To use, dip dust cloth or rag into oil, blot the oil by folding the cloth together, and then dust your furniture. Leaves a beautiful finish! Washing Powder Cost: $1.88 for 90 washes 1 bar laundry soap 1 cup washing soda 1/2 cup borax. Grate soap. Add washing soda and borax. Use 3 teaspoons per load for top loading machine, 2 teaspoons per load for front loader. Super Effective Weed Spray Cost: $0.40 for 4 litres weed spray 4 litres white vinegar 1 cup salt 1 tbsp washing up detergent. Mix well. Spray on weeds to kill them. This is a very effective weed spray so only spray it on the things you want to kill. It is excellent for weeding paths and pavers and along the edges of garden beds. Shared from Debt Free, Cashed Up and Laughing  The last couple of days have been good blanket washing days - bright, warm sunshine and a gentle breeze, so I've taken advantage and washed all the winter blankets ready to store them for the summer.
I use this wool wash recipe, which is based on the Martha Gardener Wool Mix available at supermarkets. I've used it for 30 years on all our woollens and delicates and anything clothing or manchester that is stored away. It leaves woollens especially soft and clean, and helps to deter bugs like silverfish and moths that like to feast on our woollies. Ingredients: 4 cups Lux flakes* 4 cups boiling water 1 cup methylated spirits 2 tbsp eucalyptus oil Method: Mix together and bottle. To use dissolve mixture in hot water, cool before gently kneading woollens to wash. Rinse well and dry carefully in the shade, preferably flat to retain shape. *Lux flakes - you can use any pure soap flakes or grate cakes of pure soap to get the flakes. Depending on the size of the cakes of soap you'll need 2 or 3. If you use the zester side of your grater the soap will dissolve easily and quickly. From the Laundry: Manchester Tip Store  I have no idea if the humble, but oh so very delicious, vanilla slice is an Australian creation or not, but I am more than happy to enjoy one every now and then. So last week when the topic came up in the Member's forum, and Coles had Lattice biscuits on sale, it didn't take too much encouraging to have me dragging out the slice tin, whipping up a custard and making a passionfruit icing. Because if it doesn't have passionfruit icing it isn't a real vanilla slice (a bit like neenish tarts that have white icing instead of pink - it's just wrong!). I'd love a passionfruit vine but we don't have the room so I had to resort to using a tin of passionfruit pulp. Of course that was way too much so the excess is frozen in ice cube trays. Anyway, back to the vanilla slice. I remembered my mother making the lattice biscuit vanilla slice when she was too busy to make the pastry from scratch so I wasn't at all worried about giving it a try. I did have to buy two packets of the biscuits though. You'll need a slice tray about 16cm x 26cm (or a Tupperware slice container works just as well). Line the tray with baking paper, making sure it comes up the sides so you have a "handle" to lift the prepared slice out. Place a layer of biscuits in the tray, shiny side up. Make a nice thick vanilla custard. Let it cool to warm then spread it over the biscuits. Place a layer of biscuits over the custard, shiny side down. Make a passionfruit icing. We prefer the icing to be reasonably thick so it sets quite hard (stops sticky fingers). Spread the icing over the top layer of biscuits. Place the slice in the fridge to set and chill, about two hours. Cut the slice into squares, using the edge of the biscuits as a guide. Make a cup of tea, use your best china and enjoy a fresh, yummy vanilla slice with your tea. MOO Vanilla Slice Ingredients: 200g packet Arnott's Lattice biscuits 1/3 cup custard powder 2 cups milk 1 tsp vanilla extract 1/4 cup caster sugar 1 cup icing sugar mixture 1 passionfruit, halved Method: Grease a 3cm-deep, 16.5cm x 26cm (base) slab pan. Line base and sides with baking paper, allowing a 2cm overhang at both long ends. Place 12 biscuits, in a single layer, in pan to cover base. Combine custard powder and 1/4 cup milk in a saucepan. Whisk until smooth. Pour in remaining milk. Add sugar and place pan over medium heat. Cook, stirring constantly, for 5 minutes or until custard comes to the boil. Continue cooking, stirring constantly, for 2 minutes. Remove from heat. Cover surface of custard with plastic wrap. Set aside for 30 minutes to cool slightly. Pour warm custard over biscuits. Top with another layer of 12 biscuits. Refrigerate for 1 hour or until set. Sift icing sugar into a bowl. Add 1 tablespoon passionfruit pulp. Stir to make a thick icing, adding more pulp if required. Spoon icing over slice. Refrigerate for 1 hour or until icing sets. Cut slice into squares, using shape of biscuits as a guide. Serve. This post has been shared from Debt Free, Cashed Up and Laughing
 When it comes to keeping the bathroom not only smelling clean, but actually really clean drastic times call for drastic measures. Everyone has times when visiting the bathroom can fill you with dread. It may be you have littlies toilet training or illness in the house or a dozen other reasons. Bathrooms are a thriving bacteria factory.
Deodorize and kill all those unwanted germs with some MOO toilet bombs. You will need: 1/3 cup bicarbonate soda 1/2 cup citric acid 30 drops of lavender, peppermint and lemon essential oils Water A tray to use as a mould - a flexible ice cube tray is good for this Step 1. Mix the bicarb soda and citric acid together and add the oils (if the mixture is not damp add a little water to the mixture). Step 2. Press the mixture into a mould (an ice cube tray is ideal) and leave to set for around 6 – 8 hours until they are dry. Once set, they are ready to use. Drop one or two in the toilet last thing at night, let them fizz and bubble and work their wonder overnight. In the morning just flush for a sparkling toilet. 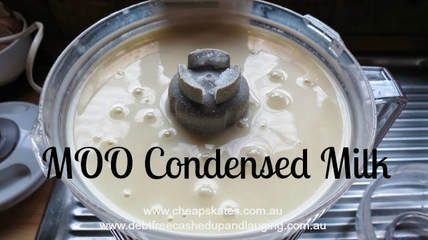 I've just been browsing the Coles catalogue for this week and notice that condensed milk is on sale for $2.50, save 70 cents. I was gobsmacked! It's obviously been a while since I bought condensed milk because the last time (I just checked my notes) it was $1.69!
I do use condensed milk quite often, in baking and to make Russian caramels, but I can assure you I wouldn't be if I had to pay $2.50, let alone $3.20, a can (and those cans are about 30g smaller than they were when they were $1.69!). MOO condensed milk has been a staple in my pantry for years. It's easy to make, tastes and works exactly like the tinned version and costs less than $2 to make more than double the quantity you'd be paing $3.20 for. Here's my go to condensed milk recipe - and don't worry about being able to store it before it goes yellow. It will keep in the fridge for at least a week, longer if you turn the container upside down. But it freezes! Yes, put any extra in the freezer until you're ready to use it in another recipe. MOO Condensed Milk Ingredients: 1 cup hot water 2 cups skim milk powder 2 cups white sugar 6 tbsp butter or margarine Method: Place all ingredients in a food processor and mix for about 3 minutes. The mixture will be quite thin, but thickens on standing for about an hour. Use immediately or refrigerate for up to one week. Can be frozen, thaw before use. Makes 3 cups. Seriously, it is so quick and easy to make and so cheap - why would you ever spend your hard earned dollars on tinned condensed milk? Shared from Debt Free, Cashed Up and Laughing  Have you priced veggie burgers from the deli or the chiller cabinet at the supermarket lately? They are expensive - over $3 each! This recipe makes six for less than the price of one. It's quick and easy too. Best of all you can make the patties ahead of time and keep them in the fridge until you're ready to cook them. They'll keep for two days covered in the fridge, perfect for those busy days.
We love them as burgers with salad and grilled pineapple, but they're good as a savoury part of a meal, hot or cold. If they're hot I make a gravy to go with them and sever them with sweet potato chips and broccoli (no idea why, did it once, everyone at it all so I've kept doing it) or cold with salads and a sweet chilli mayo. They're great for the end of your shopping cycle when veggies may be looking a little sad and limp - use them up and turn them into something delicious. Veggie Burgers Ingredients: 2 slices wholegrain bread, crumbled Several leaves of fresh Italian parsley, chopped 1/2 cup fine, dry bread crumbs, plus extra for coating 3/4 cup grated tasty cheese 1-1/2 tablespoons vegetable oil 3/4 cup finely chopped onion 1/2 cup finely chopped green or red capsicum 1/2 cup frozen corn kernels 1 clove garlic, minced 1/2 teaspoon chili powder (or less to taste) 1 egg, lightly beaten 1/2 cup solidly packed mashed sweet potato 1/3 cup ricotta 1/2 teaspoon salt 1/2 teaspoon pepper 2 tablespoons butter 1/4 cup plain flour Egg wash Method: In a medium-size bowl, mix together the crumbled bread, parsley, bread crumbs, and grated cheese. Set this aside. Heat the oil in a medium-size frypan over medium heat, then add the onion, pepper, and corn. Sauté the vegetables until soft, about 7 minutes, stirring often. Mix in the garlic and cumin and cook it all for another minute. Remove the pan from the heat and spoon the contents into the bread crumb mixture. In a large bowl, mix together the egg, sweet potato and ricotta. Add the bread crumb mixture, stirring thoroughly, then season with the salt and pepper. Flour your hands, then shape the mixture into six 15mm thick patties, using about 1/3 cup for each one. Dredge the patties in plain flour, then egg wash, then in bread crumbs and refrigerate them for about 1-1/2 hours. Melt the butter in a large frypan, transfer the patties to the pan and fry them over medium heat until they turn golden, about 4 minutes on each side. Remove them from the pan and serve right away. Makes 6 patties. Note: The crumbled wholegrain bread is essential to the texture, and prepared bread crumbs shouldn't be substituted. Put the bread slices out for about 30 minutes to air-dry, then crumble them by hand, with a serrated knife, or in a food processor. |
Archives
April 2020
Categories
All
|
 RSS Feed