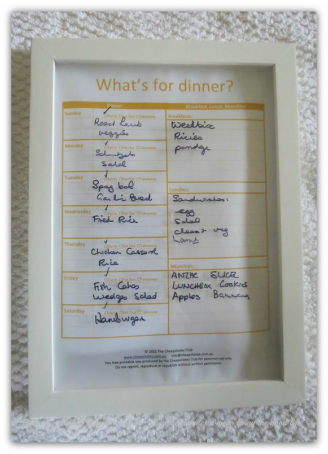
Make a Menu Board
Having a written meal plan saves you time and money. Lots of Cheapskaters are using our What's for Dinner meal plans, created each week by Anne and included in our newsletter, for inspiration or even as their weekly meal plan. To make your meal planning easier, we have made a printable you can download and print, as often as you like.
Or you can download and print it just once, and make this really simple but very attractive and useful perpetual menu board and save on the paper and printing.
To make a menu board you will need:
An A4 size photo frame with a glass front
Spray paint (if you want to change the colour)
1 copy of the What's for Dinner meal planner
Spray glue or a good, strong glue stick
Magnet tape or photo wire and hooks
Step 1. Print the What's for Dinner meal planner.
Step 2. Remove the back from the photo frame. Wipe the frame down and paint it if that's what you're going to do. I used a photo frame I already had and left it white, as it matches the appliances in my kitchen.
Step 3. Spray the backing board with glue. Place the printed meal planner on the backing, centering it. Use a cloth or sponge to carefully smooth out any wrinkles and make sure the paper is firmly stuck to the backing.
Step 4. Place the glass into the frame, then put the backing into the frame. Close the little clips, making sure they are tight.
Step 5. If you are going to hang the board on your fridge, attach double-sided sticky magnet tape to the top and bottom. If you are going to hang it from a hook, attach wire or string.
Use a whiteboard marker to write your meal plan on the glass each week. It will wipe off with a dry cloth so you can use it over and over and over.
Platinum members can login for full access to the Member's Centre, including the complete Tip Store where there are over 12,000 money, time and energy saving tips just for you!
Not a Platinum Cheapskates Club Member?
Please upgrade to a Platinum Cheapskates Club membership to be able to access our Member's Centre.
Click here to upgrade your Cheapskates Club membership today
Not a Platinum Cheapskates Club Member?
Please upgrade to a Platinum Cheapskates Club membership to be able to access our Member's Centre.
Click here to upgrade your Cheapskates Club membership today
