100 Days to a Cheapskates Style Christmas Day 63: Revamping Gift Bags
Brown paper gift bag, redecorated using crepe paper, scrapbooking paper,
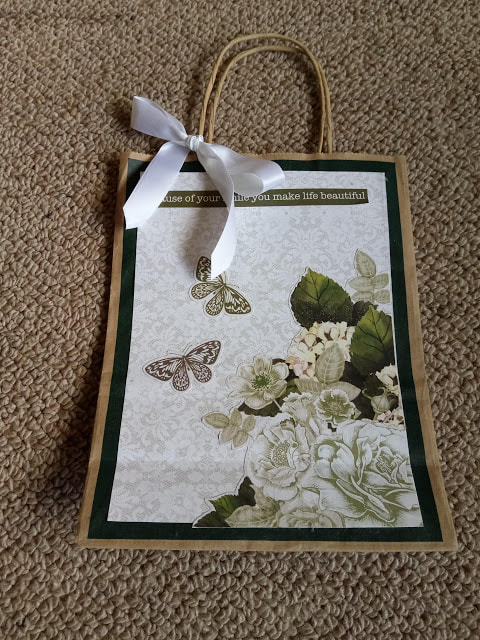
stickers and a cut out sentiment
stickers and a cut out sentiment
Last year in the Boxing Day sales, Hannah bought the loveliest wrapping papers, but some of the gifts need bags. The lovely Maureen brought lots of gift bags to card day a couple of months ago, and we all had our pick.
Why am I telling you this? Because they're gorgeous bags, they just need a little prettying up to make them usable.
Here is just one of the bags I've done already, just using papers and ribbons and lace I had in my stash. I'm thrilled with the way they've turned out, and even happier with the saving. Pretty gift bags are quite pricey, so revamping and reusing them just makes sense, financially and ecologically.
If you don't have any gift bags to redecorate, you can turn any paper bag into a fabulous designer gift bag in just a few minutes and with just a few embellishments, most of which you will probably already have on hand.
Idea No. 1
Turn the top of your paper bag over 5cm. With a ruler and sharp pencil evenly mark 1cm lines 1cm apart along the middle of the flap. Using a Stanley Knife or similar and the ruler cut along the pencil lines through all the thicknesses of the paper bag.
Take a length of narrow ribbon and thread through the slits. Tie a large knot in each end to stop it from pulling out.
Idea No. 2
Measure your paper bag from the top edge of one side, down, across the bottom and up the other side. Add 15cm to this measurement and double it. Cut a length of ribbon to the final measurement and then cut that in half to give you two lengths of ribbon. Measure in 5cm from the side of the bag and leaving a 7.5cm tail, carefully glue the ribbon down the bag, across the bottom and up the other side again leaving a 7.5cm tag. Repeat the process with the other length of ribbon. Tie each length into a granny knot at the top of the bag to secure.
Idea No. 3
Turn the top of your bag down 5cm. Measure in 3cm from each side and cut a 1cm slit through all thicknesses of the bag. Take a stem of holly and push through the slits, folding the stem out at the back to secure.