Sentry Page Protection
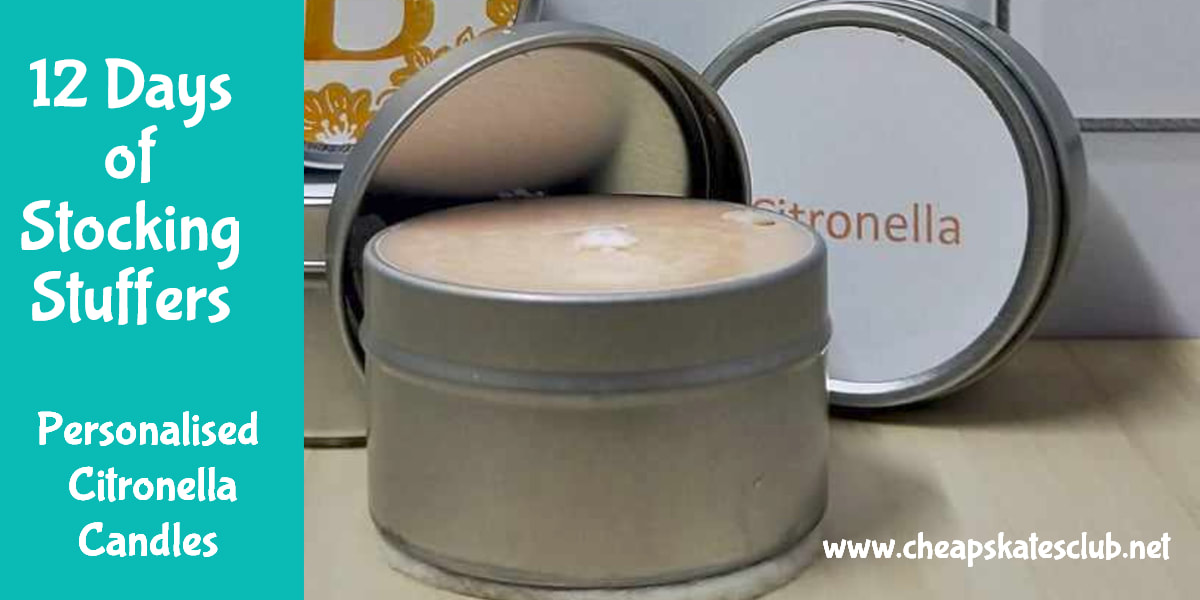
It's summer, and that means, no matter where you are in Australia, it is mosquito season.
These very cute, very handy and very useful little citronella candles help to keep the mozzies at bay while you enjoy the great outdoors this summer.
And they make wonderful gifts too!
These very cute, very handy and very useful little citronella candles help to keep the mozzies at bay while you enjoy the great outdoors this summer.
And they make wonderful gifts too!

You will need:
Small lidded tins
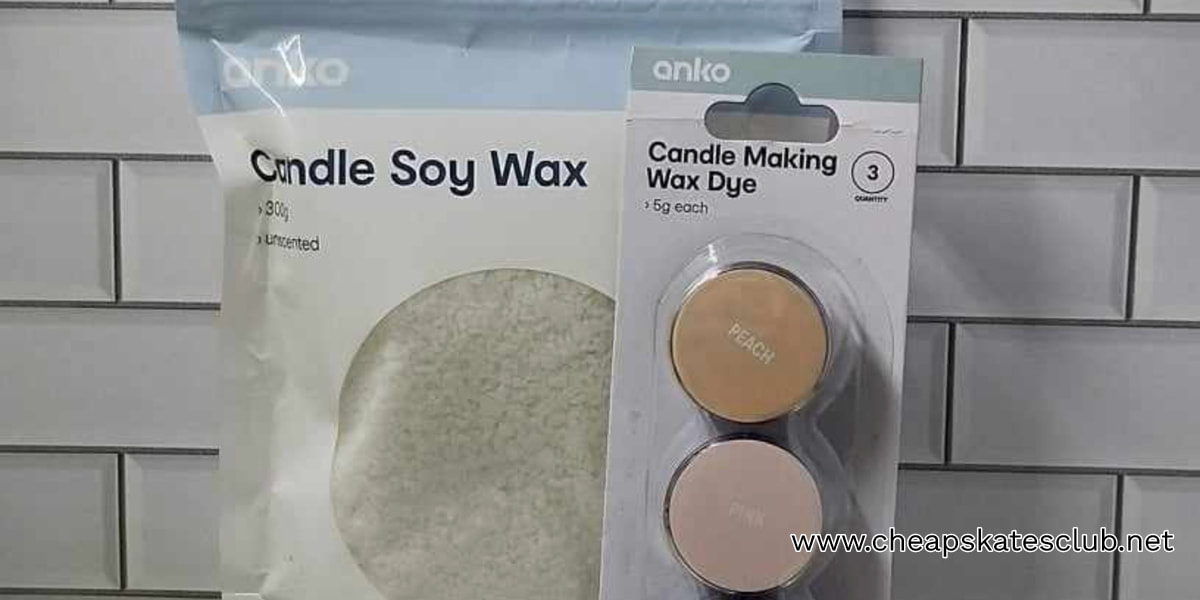
Soy candlewax* (or the candlewax of your choice)
Candle wicks
Citronella oil*
Candle colour (optional)
Sticky labels
Small piece of felt or woollen fabric
Small lidded tins
Soy candlewax* (or the candlewax of your choice)
Candle wicks
Citronella oil*
Candle colour (optional)
Sticky labels
Small piece of felt or woollen fabric
Step 1. Place the base of the tin on the piece of felt and trace around it. Cut the circle out, on the inside of the pencil mark; this ensures it will fit exactly. Glue in place with a strong wet glue, using a dab of hot glue to hold it in place while the wet glue dries. This protects whatever surface the candle is sitting on from scorching or burning when the candle is lit.
Step 2. Take the candle wick and using a dab of hot glue, stick it in place in the centre of the tin.
Step 3. Melt the wax. The easiest way to do this is in an old tin or pot that you don't use for cooking over boiling water. The wax will be almost impossible to clean out completely, making whatever you use only suitable for melting wax.
If you are remelting a citronella candle, shave it into the tin, and melt it slowly over boiling water.
Step 4. If you are re-melting a citronella candle, skip adding the essential oil. Once the wax has melted, add your citronella oil and colour and mix well. I use 5 - 10 drops of citronella oil, you can add up to 20, depending on how strong you would like the mosquito repellent effects to be.
Step 5. Carefully pour the melted candlewax into the tin, holding the wick in place. To keep the wick straight while the candle cools, wrap the excess length around a pencil and rest it across the top of the tin. Let the candle cool completely. When the candle is set, trim the wick to 5mm.

Step 6. While the candle is setting, make the label for the top of the lid. I stamped a border around the edge and stamped an initial in the centre then used a 1-3/4 inch circle punch to cut it out. You can make the label on your computer and print it onto your sticky paper or label. You can handwrite on the label. Create the label however you want to, this is your gift to give.
Once you've made the label, stick it to the centre of the lid.
And you are done! One personalised citronella candle.
Once you've made the label, stick it to the centre of the lid.
And you are done! One personalised citronella candle.
Where to get the supplies I used:
Anko Candle Soy Wax 300g - Kmart
Anko Candle Making Wax Dye 3 colours - Kmart
Anko Candle Wicks 30 pack - Kmart
Set of 4 lidded tins (2 inch) - a local $2 shop
A4 sticky paper - a local $2 shop
The Stampin' Up products I used are available in my Stampin' Up store:
Classic Letters Stamp Set
Circle Sayings Stamp Set
Mango Melody Stampin' Pad
1-3/4 inch Circle Punch (retired)
Related Articles |