 This cake came about because until the kitchen renovation is complete, I don't have a working oven. I saw this pie maker in Kmart for $15 and decided to try it to make a meat pie for our dinner. I figured if it didn't work, then it was only $15 I had wasted.
As Hannah says "best $15 spent ever!" So far we've made pies, quiches and cakes. One of the cakes I tried was a pineapple upside down cake. I found the recipe in Mum's recipe book, and of course adapted it to suit my style of baking (and the pie maker!). It turned out perfectly, and one recipe makes two cakes, one to eat and one to freeze (yes, it freezes!). Ingredients: 1 vanilla cake mix 2 eggs 30ml vegetable oil 3/4 cup water 3-1/2 pineapple slices in juice, drained and let dry a little on paper towel glace cherries 4 tbsp brown sugar 1tsp butter Method: Line the base of the pie maker with baking paper. This isn't necessary for baking pies, cakes or quiches as a rule, but this recipe makes a toffee, so it's easier to tip the cake out if the base is lined. Sprinkle the brown sugar over the baking paper. Dot with the teaspoon of butter. Keep one pineapple ring whole, and cut the others in half. Arrange them over the brown sugar. Put a cherry in the centre of each piece of pineapple. Turn the pie maker on to start heating. Beat the cake mix, eggs, oil and water until smooth. Pour 1 cup cake batter evenly over the pineapple. Smooth it over, if you think it needs a little more batter, add another 1/4 cup. Close and clip the lid. Cook for 10 minutes. Turn off the pie maker and let the cake sit with the lid closed for 5 minutes. Carefully turn the cake out onto a cake rack to cool. Watch me make Pineapple Upside Down Cake live.
0 Comments
 Ingredients
Crepes 3 eggs 1/2 teaspoon salt 2/3 cup all-purpose flour 1 cup milk Filling 200ml sour cream 200g mushrooms sliced 1/4 cup sliced black olives 2 spring onions, finely sliced, including the green, about 1/4 cup 2 stalks very finely chopped celery 2 cups diced cooked chicken 1 cup grated cheese, divided Method: To make the crepe batter, beat the eggs, salt, flour and milk together until smooth. This is a very thin batter, you're making crepes, not regular pancakes. Heat a non-stick pan over medium heat. Lightly grease the base with a butter. Pour about 1/4 cup of the batter into the pan and swirl it around to cover the base. Cook 1 minute. Carefully flip. Cook 1 minute. Repeat until all the batter has been used. To make the filling: Pre-heat oven to 200 degrees Celsius. Spray a lasagne dish with cooking spray. Combine the sour cream, mushrooms, olives, spring onion, celery, chicken and 1 cup of the cheese in a bowl. Mix to combine. Place a heaped tablespoon of the filling in the centre of each crepe. Fold ends over and roll up. Place in baking dish. Bake 20 minutes. Sprinkle remaining 1 cup of cheese over the top, return to oven and bake another 10 minutes until cheese is melted and golden. Serve immediately.  These little bite-sized morsels of cheesy goodness are great fingerfood for a party, a nice starter to a meal or the perfect nibbly to enjoy with drinks. Serve them warm with a sauce for dipping - tomato or sweet chilli are good - and watch them disappear.
Cheesy Potato Bites Ingredients: 2 large potatoes, peeled and diced 1 cup grated mozzarella cheese Salt and pepper to taste 3 cups oil to fry 1/2 tsp. paprika Method: Boil or steam the potatoes until fork tender. When the potatoes are cooked, mash well, adding salt, pepper and paprika. Drop a tablespoon of the mashed potato on your hand and make it into a shape of a ball, now press the edges so it becomes flat. Shape it into a well shape so you can fill it in with the cheese. When your shape is right, add a teaspoon of grated cheese and shape the potato around it to make a ball so the cheese is completely enclosed in the potato. Heat the oil on medium heat. Fry the potato balls until they are golden brown. Drain on brown paper or paper towel. From the Vegetables Recipe File 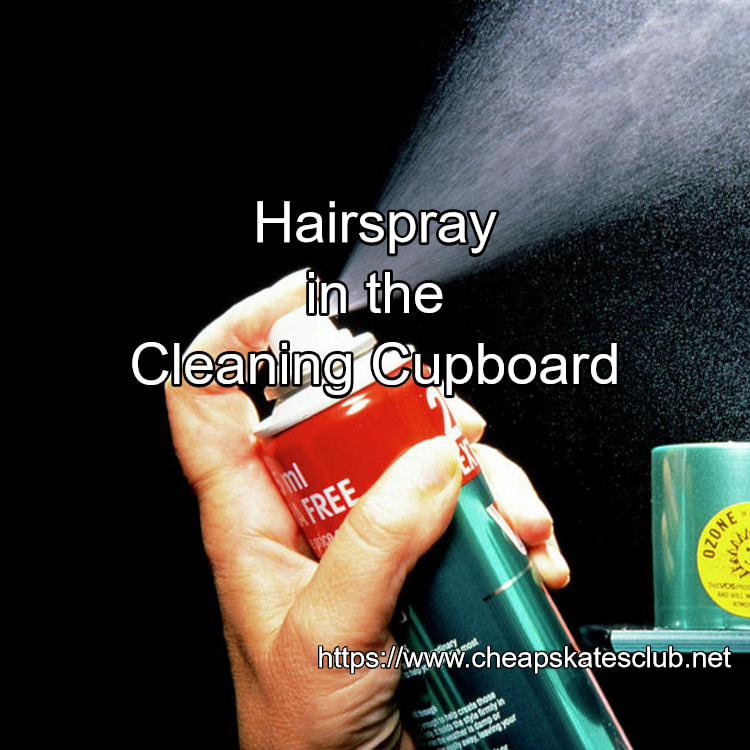 Keep a can of hairspray in the cleaning cupboard. It will remove ink, marking pen, even the sticky residue left after stickers and labels have been removed. It can be used on clothing, walls, floors and furniture. You don't need to buy the expensive sprays you would use on your hair, the cheapest you can find will do the job. Just remember to do a test in an inconspicuous spot to make sure it won't take the colour or finish off whatever you are trying to clean.
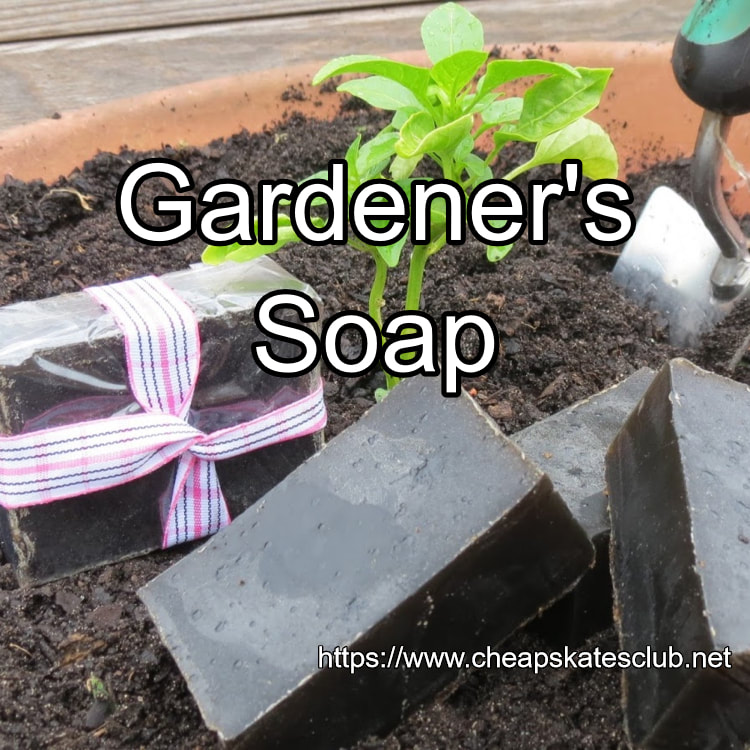 Do you love gardening (or know someone who does)? Do you have a lot of coffee grounds to compost each week (or know someone who does)? Then take those used coffee grounds into an amazing gift for yourself (or the other gardeners in your life) and turn them into Gardener's Soap.
This soap uses recycled coffee grounds as the "scrubber" element, leaving dirty hands, elbows and knees (yes, I am a very messy gardener) clean and soft. You will need: 500g block of clear melt-n-pour soap base 3 - 4 used and dried coffee pods A little isopropyl alcohol in a spray bottle Soap mould (I used an old block cake tin lined with clingwrap) A 2 litre Pyrex (or other microwave safe) bowl Step 1. Prepare your soap mould. I used and old block cake tin that was lined with clingfilm. You could use silicone cake or cup cake moulds, they won't need lining. Step 2. Cut the block of soap base into 1cm cubes. Drop them into a Pyrex bowl. Step 3. Microwave on Medium-High for 2 minutes. Stir. Microwave another 1 minute and remove from the microwave. Stir continuously until all the soap base has melted. I suggest taking the soap base out of the microwave before it has all melted so the temperature doesn't go above 50 degrees Celsius (if it goes over 50 degrees the soap can become cloudy). Step 4. Drop the coffee grounds into the bowl and mix. Be sure to stir everything in thoroughly, so the grounds are evenly distributed throughout the mix. Step 5. Pour into the prepared soap mould/s. Use a spatula to scrape every last drop of soap out of the Pyrex dish. Step 6. Spritz the top of the soap with the rubbing alcohol. This removes the little bubbles that are on the surface and leaves the top of the soap with a nice sheen. Step 7. Let the soap set overnight. The next day turn it out onto a chopping board, remove the clingwrap and cut into blocks. From Debt Free, Cashed Up and Laughing 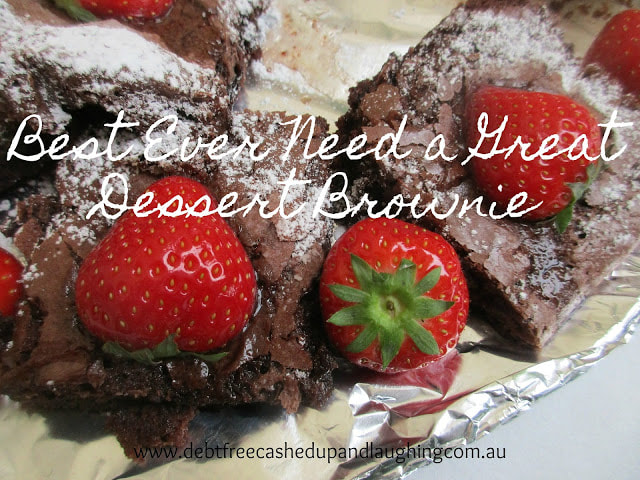 These brownies are perfect!
I have all the ingredients, I know everyone loves chocolate and honestly they really are the best brownies ever. They're moist and gooey, fudgey, rich, delicious and cost just $3.40 to make! I'll clarify the cost and let you know that all the ingredients, apart from the cocoa and the choc chips, were from Aldi. The cocoa is Woolworths generic and the choc chips are Cadbury that were bought on half-price sale at Coles. If you use full-price and/or brand name ingredients then the cost will rise - substantially. Unfortunately the end result won't reflect that increase in cost so go generic ingredients if you can. I am generous and cut this dessert into 10 squares, although the original recipe said it would make 12. For 34 cents a serve, it's a budget friendly but extravagant dessert for special occasions. And lastly, I serve them with a dollop of cream, but you could use ice-cream or a nice thick dollop of Greek yoghurt (I like this, it cuts the sweetness beautifully). Best Ever Need a Great Dessert Brownies Ingredients: ¾ cup cocoa powder 1- ½ cups sugar 1 cup plain flour ½ cup dark chocolate chips (or milk or white - whatever you like, they're all good) 225g butter, melted 2 eggs 2 tsp vanilla extract Method: Preheat oven to 180 degrees Celsius. Line a 20cm square tin or casserole dish with baking paper. Sift dry ingredients, then add eggs, melted butter and vanilla. Mix with a wooden spoon to combine. Pour into pan. Bake for 30 to 35 minutes. Remove from oven while centre is still moist and gooey - DO NOT OVER BAKE! Let cool in tin before cutting. Serves: 10 - 12 (go on, be indulgent - cut it into 10, you know you want to!) From the Cakes & Muffins Recipe File  This is the quickest and easiest fruit cake you'll ever make and it tastes great! Slice and serve with butter or freeze for a quick grab-n-go snack. It's cheap too. This tea cake costs $1.80 to make. I buy my baking ingredients from Aldi.
Fruity Tea CakeIngredients: 2 cups cold tea 2 cups mixed dried fruit 2 cups SR flour Method: Soak the fruit in the cold tea for 10 minutes. Beat in the self-raising flour. Pour into a greased and baking paper lined loaf tin. Bake at 180 degrees for 30 - 35 minutes or until a skewer inserted into the centre comes out clean. Let stand in tin for five minutes before turning out onto a cake rack to cool. Variations: Chocolate Tea Cake: Use 2 cups chocolate milk to replace the cold tea. Orange Tea Cake: Use 2 cups orange juice to replace the cold tea. Spicy Tea Cake: Add 1 teaspoon mixed spice with the flour. Sultana Cake: Add 1 teaspoon lemon essence with the cold tea. Use 2 cups sultanas to replace the mixed fruit. 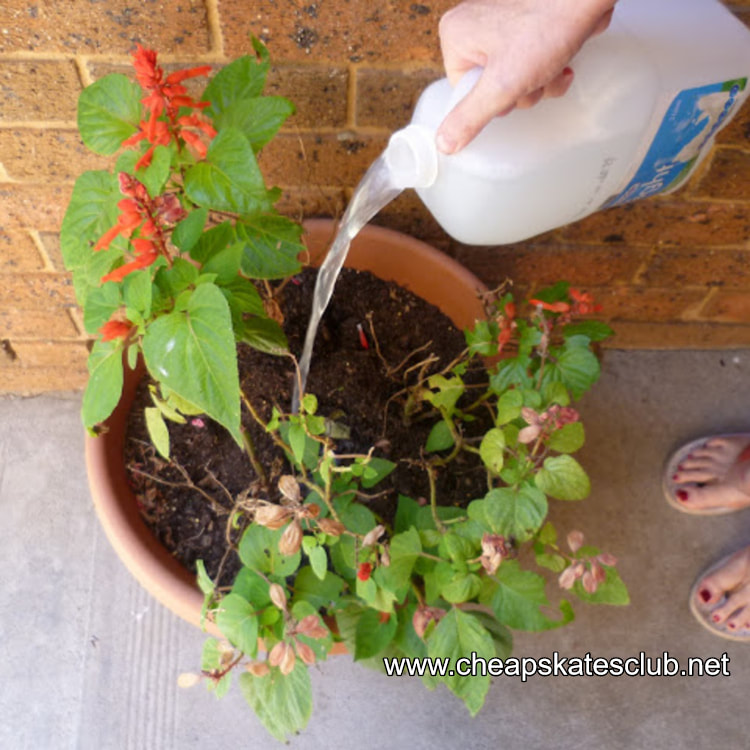 If you want to save on liquid fertiliser, save all the water you've used to rinse out your empty milk cartons, beer bottles, jam jars, tea pots, vegetable water etc and give it to your indoor plants, pot plants or border plants, they love it! And not only will you save yourself from going through liquid fertiliser/food so fast, but you'll even save a bit on your water bill!
 Bagels are delicious, crusty boiled rolls. They are great for salad fillings as they don't go soggy. Not going soggy makes them ideal for packed lunches, especially when they'll be packed for a while! And they are really, really easy to make, much easier and faster than conventional bread rolls. This recipe is for a traditional New York style bagel, and personally I think it can't be beaten, particularly by mass produced supermarket bagels. I've used this recipe exclusively for about 5 years now so I guess you could say it's a winner. MOO Bagels Ingredients: 4 cups plain flour 1 tbsp white sugar 1 tbsp vegetable oil (I use olive oil, you can use any vegetable oil you have on hand) 2 tsp. dry yeast 1-1/2 cups lukewarm water Method: Step 1. Combine 2 cups flour, sugar, salt and yeast in the bowl of a mixer. Step 2. Add oil to the water and pour into the mixing bowl. 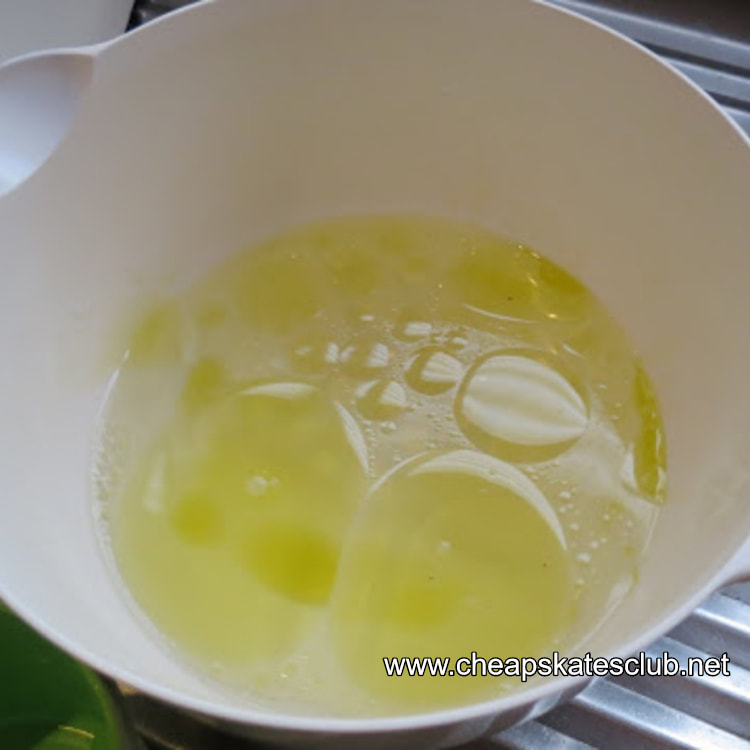 Step 3. Mix with a dough hook until smooth and creamy looking. 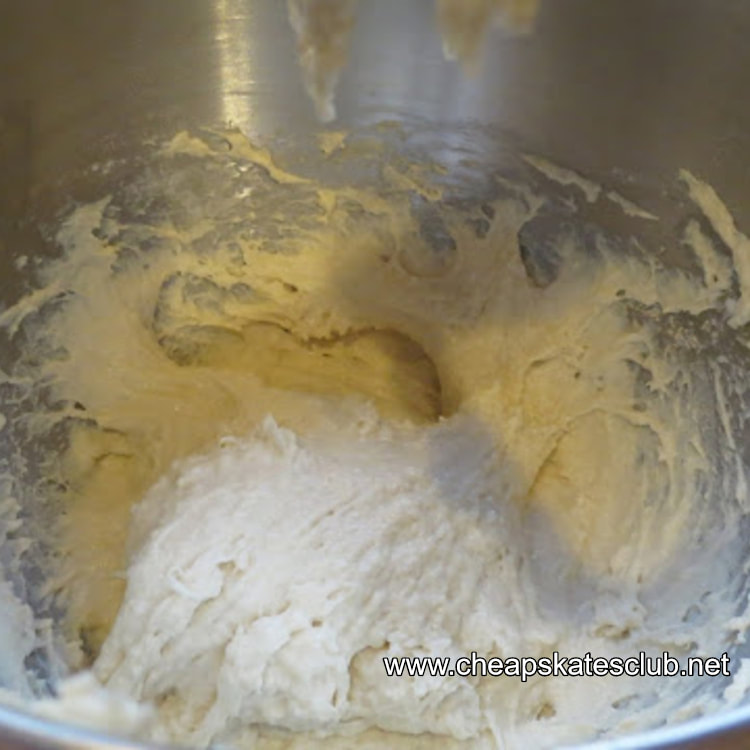 Step 4. Add remaining flour and continue to knead with the dough hook for several minutes until the dough is uniform and smooth. If you don't have a mixer with a dough hook, you can beat the batter by hand with a wooden spoon, then add the remaining flour and knead it by hand for 10 minutes. Step 5. Turn the dough out onto a lightly floured board. Cut dough into 8 equal size balls or, if you're as OCD as I am, get out the scales and weigh each ball of dough so the finished bagels will be the same size. 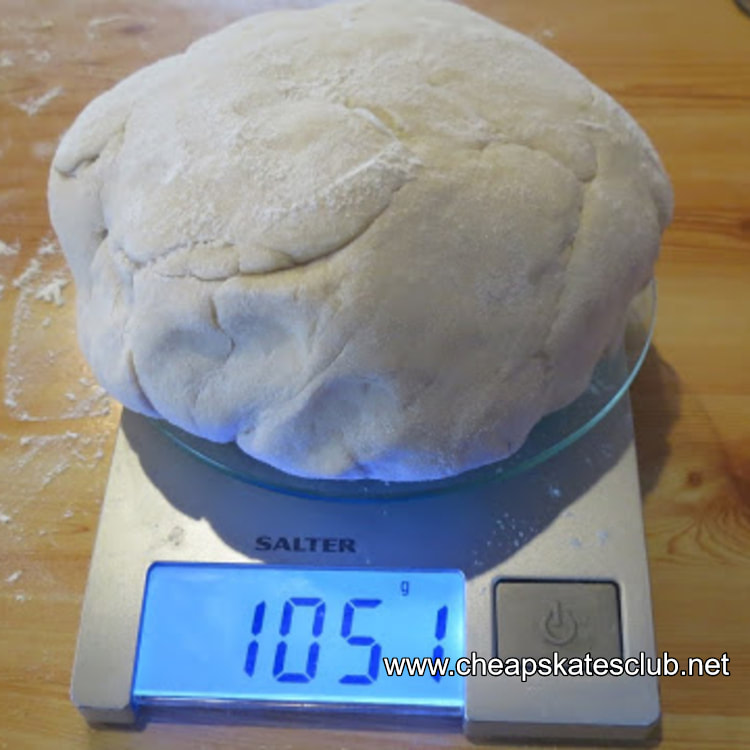 Let them rest for 20 minutes, the dough will puff up into balls.  Step 6. Roll each dough ball into a long "snake" until it will wrap around your hand to form a circle. Don't make your circles to small or when the bagels rise they will just look like regular, over-sized rolls. You want them to have the "hole" in the middle. Fuse the ends of your dough snakes well, then roll with the palm of your hand to smooth them over. Let them rest for 20 minutes.  Step 7. In the meantime, preheat oven to 205 degrees Celsius, bring a pot of water to the boil and oil a large baking sheet. Drop the bagels into the boiling water and cook for 1 minute on each side. Let them dry for a moment then place onto the oiled baking sheet. 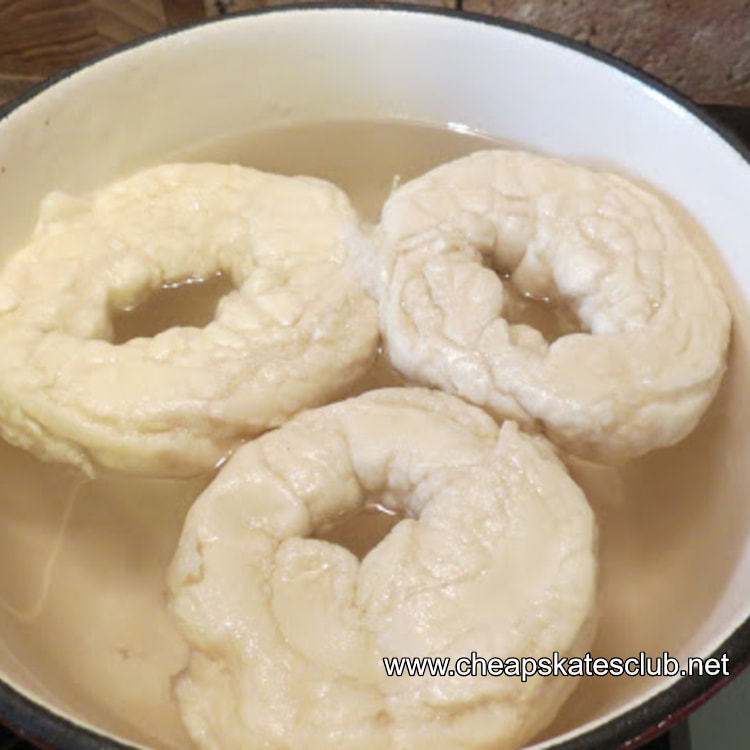 Step 8. Bake at 205 degrees for 10 minutes. Remove from oven, turn bagels over and bake for another 10 minutes. 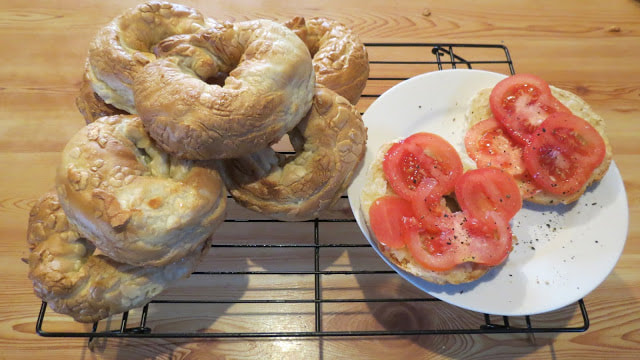 You can add flavour to your bagels before cooking. After taking them out of the boiling water, drop them face down into either poppy or sesame seeds, dried onion, dried herbs and garlic etc. then bake as per the instructions.
Cost: $1.20 or 15 cents per bagel - so much cheaper than buying them and nicer too.  The best way to save money in the laundry is to sort those piles of washing.
Sort whites from colours and fluffy items from dark to avoid needing to do extra treatments; sort drying into piles of similar fabrics so that if you must use the dryer it’s on for as short a time as possible. Sort heavy garments from lighter garments, washing them first to give them more drying time. Sort washing into easy to manage groups to make hanging and folding easier. I always hang in "people" i.e. I hang all my things together, then everyone's clothes in turn. This means that as I take things off the line and fold them they are already sorted, ready to be put straight away. Putting the washing away is a breeze because it is already sorted. |
Archives
April 2020
Categories
All
|
 RSS Feed