 The best way to save money in the laundry is to sort those piles of washing.
Sort whites from colours and fluffy items from dark to avoid needing to do extra treatments; sort drying into piles of similar fabrics so that if you must use the dryer it’s on for as short a time as possible. Sort heavy garments from lighter garments, washing them first to give them more drying time. Sort washing into easy to manage groups to make hanging and folding easier. I always hang in "people" i.e. I hang all my things together, then everyone's clothes in turn. This means that as I take things off the line and fold them they are already sorted, ready to be put straight away. Putting the washing away is a breeze because it is already sorted.
0 Comments
 Today I'm going to go over how to clean my next favourite household appliance - the washing machine.
I wash every day except Saturday. Some days I do two loads a day to get bedding and towels clean, or those extra stinky sports clothes or like yesterday Wayne's super filthy, mud stained clothes from our day out on Sunday (he was on his back under a friend's four wheel drive a couple of times - and in a good shirt too!). My washing machine gets a good workout, but it is a newer HE machine and frankly I really do long for my old Hoover. It didn't need to be babied and coddled like this one does. A once-a-month clean kept it going for almost 30 years. My new machine needs to be cleaned regularly, it tells me when it needs to be done, and the process takes three hours and uses three loads of hot water. There is an easier, cheaper and much more energy efficient way to keep your washing machine clean and in tip top shape, and it works. It's the method I've been using for 26 years. First thing you need to do is find out if your washing machine actually has a lint filter. My HE machine doesn't, check your handbook to find out if your machine has a lint filter. If your washing machine is a top loader it should have a lint filter in the agitator. Pull out the top of the agitator and it should have some kind of little bag or basket attached to it. Gently take it off and give it a good clean. You may need to empty the lint out of it first. Then rinse it under hot water. If you use fabric softener then you will also need to soak it for a few minutes in white vinegar. Fabric softeners leave a film over the mesh that actually stops the water from getting through. You need to get rid of this build up. Front loaders have different lint filters - check your handbook to find out where it is and how to get to it. If you empty and rinse the lint filter after every wash you'll stop those black flakes of gunk that sometimes appear on your washing - that's the old muck out of the lint filter flowing back up into the bowl. Yuk! While the lint filter is soaking, get a cloth and a bucket of warm water and add a splash of vinegar (about 1 cup). Use this to wipe around the top of the bowl, under the lid, over the outside of the cabinet etc. Don't forget the inside of the agitator and the fabric softener dispenser. If it's particularly grungy, sprinkle with bi-carb and use this as a scouring powder. Just watch your fingers - the edges of all those ridges and rims can be sharp (guess how I know!). Put the lint filter back together and replace the top of the agitator. Then run your washing machine through a full cycle on the longest and hottest wash cycle (this is the only time I use a hot wash) and add a full 2 litre bottle of vinegar to it. Don't add any clothes or other detergents; let the vinegar work its magic. The vinegar will remove the scum and gunk and any hard-water build up in the bowl and hoses. Wipe over the outside of the machine with a damp cloth and dry. You washing machine will sparkle inside and out. Do this on a regular basis and you'll extend the life of your machine and save on costly maintenance calls. My handbook suggests every 100 washes, for me that's about every two months because of the amount of washing I do. For my mother it's every six months or so as she only does two loads a week. If your family is larger you may need to do this more often. It may seem like a tedious chore but it is worth taking care of this most useful household appliance. Think about what you'd do if you couldn't use your washing machine for a week - hand-washing, paying for the laundromat -and you'll see the benefit quickly.  Today I'm going to go over how to clean my next favourite household appliance - the washing machine.
I wash every day except Saturday. Some days I do two loads a day to get bedding and towels clean, or those extra stinky sports clothes or like yesterday Wayne's super filthy, mud stained clothes from our day out on Sunday (he was on his back under a friend's four wheel drive a couple of times - and in a good shirt too!). My washing machine gets a good workout, but it is a newer HE machine and frankly I really do long for my old Hoover. It didn't need to be babied and coddled like this one does. A once-a-month clean kept it going for almost 30 years. My new machine needs to be cleaned regularly, it tells me when it needs to be done, and the process takes three hours and uses three loads of hot water. There is an easier, cheaper and much more energy efficient way to keep your washing machine clean and in tip top shape, and it works. It's the method I've been using for 26 years. First thing you need to do is find out if your washing machine actually has a lint filter. My HE machine doesn't, check your handbook to find out if your machine has a lint filter. If your washing machine is a top loader it should have a lint filter in the agitator. Pull out the top of the agitator and it should have some kind of little bag or basket attached to it. Gently take it off and give it a good clean. You may need to empty the lint out of it first. Then rinse it under hot water. If you use fabric softener then you will also need to soak it for a few minutes in white vinegar. Fabric softeners leave a film over the mesh that actually stops the water from getting through. You need to get rid of this build up. Front loaders have different lint filters - check your handbook to find out where it is and how to get to it. If you empty and rinse the lint filter after every wash you'll stop those black flakes of gunk that sometimes appear on your washing - that's the old muck out of the lint filter flowing back up into the bowl. Yuk! While the lint filter is soaking, get a cloth and a bucket of warm water and add a splash of vinegar (about 1 cup). Use this to wipe around the top of the bowl, under the lid, over the outside of the cabinet etc. Don't forget the inside of the agitator and the fabric softener dispenser. If it's particularly grungy, sprinkle with bi-carb and use this as a scouring powder. Just watch your fingers - the edges of all those ridges and rims can be sharp (guess how I know!). Put the lint filter back together and replace the top of the agitator. Then run your washing machine through a full cycle on the longest and hottest wash cycle (this is the only time I use a hot wash) and add a full 2 litre bottle of vinegar to it. Don't add any clothes or other detergents; let the vinegar work its magic. The vinegar will remove the scum and gunk and any hard-water build up in the bowl and hoses. Wipe over the outside of the machine with a damp cloth and dry. You washing machine will sparkle inside and out. Do this on a regular basis and you'll extend the life of your machine and save on costly maintenance calls. My handbook suggests every 100 washes, for me that's about every two months because of the amount of washing I do. For my mother it's every six months or so as she only does two loads a week. If your family is larger you may need to do this more often. It may seem like a tedious chore but it is worth taking care of this most useful household appliance. Think about what you'd do if you couldn't use your washing machine for a week - hand-washing, paying for the laundromat -and you'll see the benefit quickly. 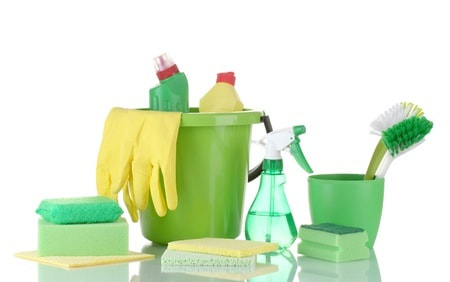 As I was whizzing through the checkout at my local supermarket recently I was astounded to hear the fellow on the checkout telling the lady in front of me that she must have the cleanest house around because she had so many different cleaning products in her trolley. She had a multi-purpose spray, window cleaner, a gel cleaner, another gel bathroom cleaner, a bleach, a box of washing powder, a spray bottle of ironing aid, a spray can of furniture polish, a shower cleaner and two bottles of toilet cleaners. Brother what a load of money she was about to pour down the drain! I couldn't help myself and joined the conversation when it became a "but I have to have them or I just can't keep the house clean" talk. I politely pointed out that a bottle of vinegar, a box of bicarb, a jar of borax, a bar of soap and perhaps a little elbow grease would do the same job as all these cleaners for a fraction of the price and damage to the environment. I was very excited when she decided I was right and she didn't want all those cleaners. I did feel a little sorry for the people behind us as she had them taken off her bill, but I was so proud of her, especially when she said she already had everything she needed to clean the Cheapskates way in her cleaning cupboard. This experience had me thinking: just how many of us have never tried to clean using cheaper alternatives because we didn't know there were any or we weren't sure how to use them? You can make your own household cleaners easily and best of all cheaply using these tried and true recipes. As well as saving you money, these cleaners will save you time and effort and rid your home of some nasty chemicals too. If you were to make all the recipes below you would have a cleaning solution for just about every household cleaning problem for the grand total of $6.72! If you were to add the equivalent of these products to your shopping trolley you would add another $44.50 to your grocery bill. By making them yourself you are saving around $37.80! What an incredible saving! By keeping some very inexpensive and basic supplies in your cleaning cupboard you can clean your whole house for just a few cents rather than hundreds of dollars. Bi-carbonate Soda (bi-carb or baking soda) – is a powerful cleaning agent on its own, even more powerful when combined with other materials. Borax - found in the cleaning aisle, usually next to the Drano. I use Harpers, in a white tub with a red lid. It's usually on the bottom shelf. Vinegar – is made from fermented apples, grapes, sugar cane, malt or wine. It is an acid and a mild disinfectant. Washing Soda – buy it in the supermarket under the brand name Lectric Soda. It is a good water softener. Eucalyptus Oil –can be bought at supermarkets, chemists, health food and hardware stores. Use eucalyptus oil to remove sticky residue, as an inhalant and a disinfectant or a cleaner. It is toxic, so keep it away from children and pets. It will also damage plants, so beware when using it in the garden. Window Cleaner Cost: $0.10 for 250ml extra strong window cleaner 1/2 tsp washing up detergent 3 tbsp vinegar 2 cups water 1 drop blue food colouring (optional) Blend well and store in spray bottle. Scouring Powder Cost: $1.89 for 600g scouring powder 1 cup bi-carb soda 1 cup borax 1 cup salt Blend and store in container. Furniture Polish This is so easy to make, and it works! Cost: $1.13 for 375ml furniture polish 1 cup vegetable oil 1/2 cup lemon juice Pour oil and lemon juice into a squirt bottle or jar. Stir to combine. To use, dip dust cloth or rag into oil, blot the oil by folding the cloth together, and then dust your furniture. Leaves a beautiful finish! Washing Powder Cost: $1.88 for 90 washes 1 bar laundry soap 1 cup washing soda 1/2 cup borax. Grate soap. Add washing soda and borax. Use 3 teaspoons per load for top loading machine, 2 teaspoons per load for front loader. Super Effective Weed Spray Cost: $0.40 for 4 litres weed spray 4 litres white vinegar 1 cup salt 1 tbsp washing up detergent. Mix well. Spray on weeds to kill them. This is a very effective weed spray so only spray it on the things you want to kill. It is excellent for weeding paths and pavers and along the edges of garden beds. Shared from Debt Free, Cashed Up and Laughing 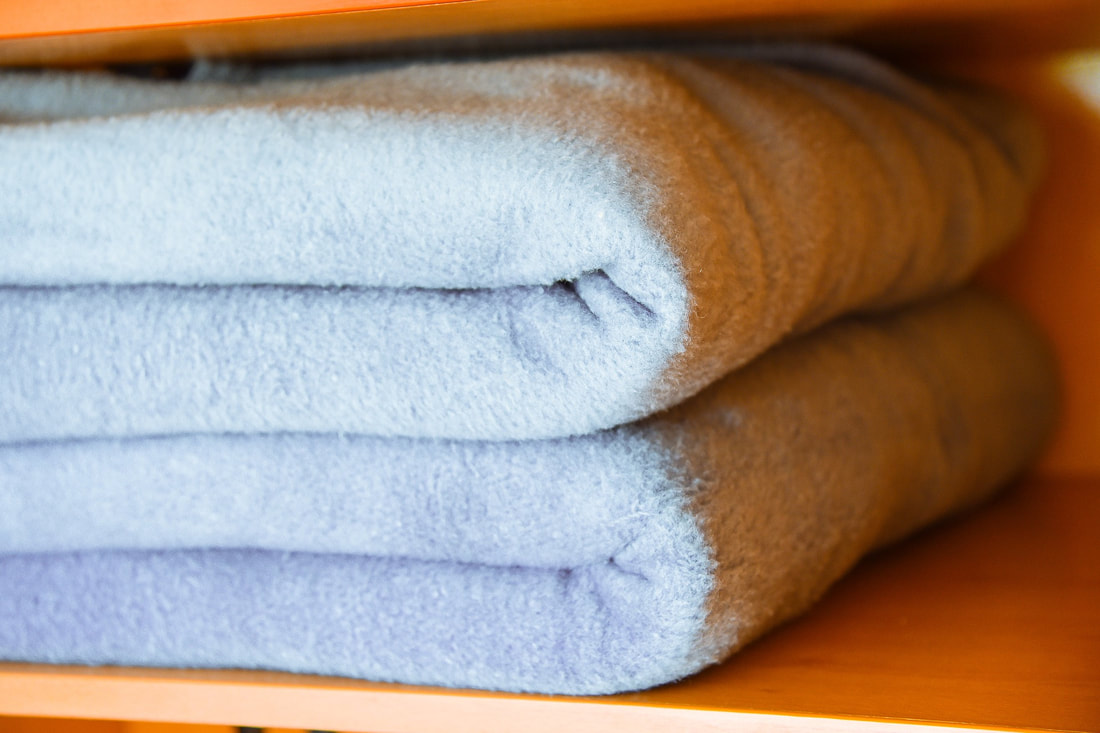 The last couple of days have been good blanket washing days - bright, warm sunshine and a gentle breeze, so I've taken advantage and washed all the winter blankets ready to store them for the summer.
I use this wool wash recipe, which is based on the Martha Gardener Wool Mix available at supermarkets. I've used it for 30 years on all our woollens and delicates and anything clothing or manchester that is stored away. It leaves woollens especially soft and clean, and helps to deter bugs like silverfish and moths that like to feast on our woollies. Ingredients: 4 cups Lux flakes* 4 cups boiling water 1 cup methylated spirits 2 tbsp eucalyptus oil Method: Mix together and bottle. To use dissolve mixture in hot water, cool before gently kneading woollens to wash. Rinse well and dry carefully in the shade, preferably flat to retain shape. *Lux flakes - you can use any pure soap flakes or grate cakes of pure soap to get the flakes. Depending on the size of the cakes of soap you'll need 2 or 3. If you use the zester side of your grater the soap will dissolve easily and quickly. From the Laundry: Manchester Tip Store  Monday I explained how to clean and maintain your dishwasher. Today I'm going to go over how to clean my next favourite household appliance - the washing machine. I wash every day except Saturday. Some days I do two loads a day to get bedding and towels clean, or those extra stinky sports clothes or like yesterday Wayne's super filthy, mud stained clothes from our day out on Sunday (he was on his back under a friend's four wheel drive a couple of times - and in a good shirt too!). My washing machine gets a good workout, but it is a newer HE machine and frankly I really do long for my old Hoover. It didn't need to be babied and coddled like this one does. A once-a-month clean kept it going for almost 30 years. My new machine needs to be cleaned regularly, it tells me when it needs to be done, and the process takes three hours and uses three loads of hot water. There is an easier, cheaper and much more energy efficient way to keep your washing machine clean and in tip top shape, and it works. It's the method I've been using for 26 years. First thing you need to do is find out if your washing machine actually has a lint filter. My HE machine doesn't, check your handbook to find out if your machine has a lint filter. If your washing machine is a top loader it should have a lint filter in the agitator. Pull out the top of the agitator and it should have some kind of little bag or basket attached to it. Gently take it off and give it a good clean. You may need to empty the lint out of it first. Then rinse it under hot water. If you use fabric softener then you will also need to soak it for a few minutes in white vinegar. Fabric softeners leave a film over the mesh that actually stops the water from getting through. You need to get rid of this build up. Front loaders have different lint filters - check your handbook to find out where it is and how to get to it. If you empty and rinse the lint filter after every wash you'll stop those black flakes of gunk that sometimes appear on your washing - that's the old muck out of the lint filter flowing back up into the bowl. Yuk! While the lint filter is soaking, get a cloth and a bucket of warm water and add a splash of vinegar (about 1 cup). Use this to wipe around the top of the bowl, under the lid, over the outside of the cabinet etc. Don't forget the inside of the agitator and the fabric softener dispenser. If it's particularly grungy, sprinkle with bi-carb and use this as a scouring powder. Just watch your fingers - the edges of all those ridges and rims can be sharp (guess how I know!). Put the lint filter back together and replace the top of the agitator. Then run your washing machine through a full cycle on the longest and hottest wash cycle (this is the only time I use a hot wash) and add a full 2 litre bottle of vinegar to it. Don't add any clothes or other detergents; let the vinegar work its magic. The vinegar will remove the scum and gunk and any hard-water build up in the bowl and hoses. Wipe over the outside of the machine with a damp cloth and dry. You washing machine will sparkle inside and out. Do this on a regular basis and you'll extend the life of your machine and save on costly maintenance calls. My handbook suggests every 100 washes, for me that's about every two months because of the amount of washing I do. For my mother it's every six months or so as she only does two loads a week. If your family is larger you may need to do this more often. It may seem like a tedious chore but it is worth taking care of this most useful household appliance. Think about what you'd do if you couldn't use your washing machine for a week - hand-washing, paying for the laundromat -and you'll see the benefit quickly. This post has been shared from Debt Free, Cashed up and Laughing Laundry. We all have to do it, at least every now and then, although if you have a family you probably spend more time than you'd like in the laundry.
While there are many products on the market for getting your laundry in tip-top shape, there are also many old fashioned ideas that still work just as well. As with any laundry advice, it is also important to check the label and the colorfastness of the garment itself, perhaps in an indiscreet area before trying anything new or even anything old. Some good old-fashioned laundry tidbits have been around for quite some time and some individuals swear by these remedies. Here are a few: Blood Stains One of the toughest and most annoying stains is the bloodstain; however just as tough is the old-fashioned remedy of hydrogen peroxide to remove that stain. It is important to get the stain as soon as possible after it happens. Removing the stain when it is fresh will help remove it more thoroughly. Grab a clean sponge or clean cloth and place the hydrogen peroxide on the cloth and then immediately onto the bloodstain. This will loosen the original stain from the fibers. Then, you can apply the hydrogen peroxide directly to the stain and let the foam do the work. Follow the directions on the garment and wash in the appropriate cycle using the appropriate bleach product. You can get a small bottle of peroxide from the chemist, I keep one on the windowsill in the laundry (between sport, working on cars and power tools I seem to have a lot of bloodstains to shift). Underarm Stains You can either spot treat the stains directly with white vinegar on a cloth or you can soak the underarm area for a longer period in the vinegar. You can add bicarb soda for an extra added scrubbing bonus as well as some dishwashing detergent. Follow label directions for washing. Or you can reach for the hydrogen peroxide again. Soak the stain with a mixture of one part peroxide, two parts full strength dishwashing liquid and rub in. Let it sit for 30 minutes and then wash it as usual. Gum on Clothing One of the worst laundry disasters is gum on clothing. If you spot the gum before washing, that is great as it makes it easier to remove. One method is to try to freeze the garment, if possible, thereby freezing the gum. If not, you can rub the gum with an ice cube in an effort to harden the gum, which makes it easier to remove. Then using a butter knife, you can scrape the gum off. Another method that has been around forever is that of using peanut butter. Rub peanut butter onto the gum softens it, making it easier to remove. Using an old toothbrush or a butter knife after makes gum removal faster and easier. Or better still, ban chewing and bubble gum completely! Ink Pen Stains Rubbing alcohol placed on a cotton ball and then placed directly on the ink stain works magic on the stain as does hairspray. Soak the stain, let it sit a few minutes then into a normal wash. While these stains are certainly nuisances, these old-fashioned tidbits should do the trick in alleviating them quickly and efficiently and save you buying any expensive stain treatments. From Debt Free, Cashed Up and Laughing 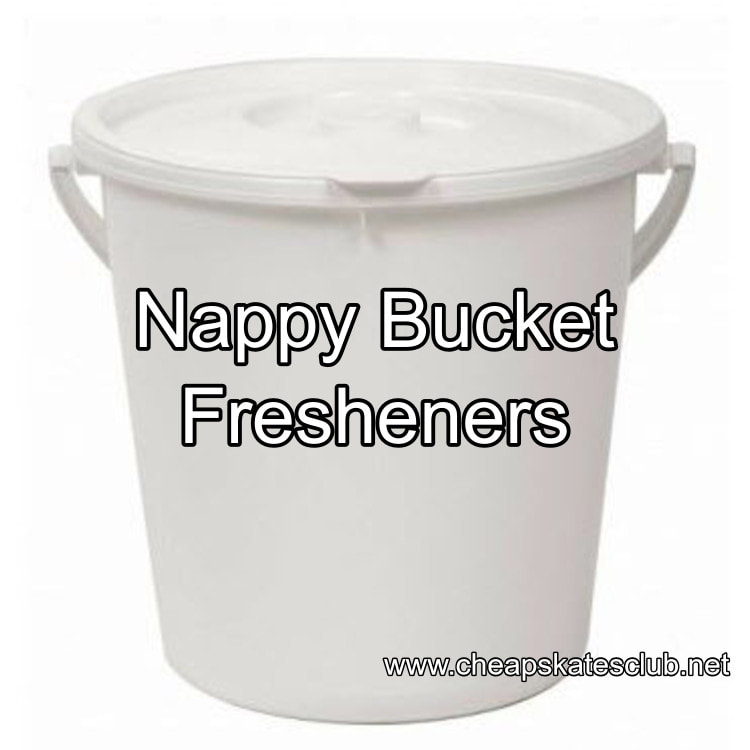 These little discs work so well and are so simple you'll wonder why some genius hasn't decided to market them and charge a small fortune! Be glad you've found this post, you'll just love using them.
If you are using cloth nappies, just pop a couple in the bottom of the nappy bucket to keep the odour down, then tip the whole lot into the wash. Easy. We are well past the nappy bucket stage in our house, but I still make up these little discs and slip them into the laundry hamper in the bathroom. I also put them into organza bags (from the $S Shop a while ago) and slip them into the boys' shoes and boots to help with the odour. Nappy Bucket Fresheners You will need: 2 cups bicarbonate soda 1 tsp peppermint oil Cold water Paper patty pans Step 1. Stir the oil into the bicarb soda. Step 2. Add just enough cold water to make a very thick paste. Step 3. Press enough mixture into the bottom of each patty pan so it's about 2cm thick. Step 4. Put them on a cake rack to dry and harden. To use, just drop two or three into the bottom of your nappy bucket. When you're ready to soak the nappies tip the whole lot into the machine and soak and wash as usual. If you are using disposable nappies, drop two into the bottom of your nappy bin and then when it's full dispose of as usual. These make a cute and useful gift for new mothers. Make a batch and store them in a ziplock bag. To present them tie them up in a little organza bag and add to a hamper or gift. |
Archives
April 2020
Categories
All
|
 RSS Feed