|
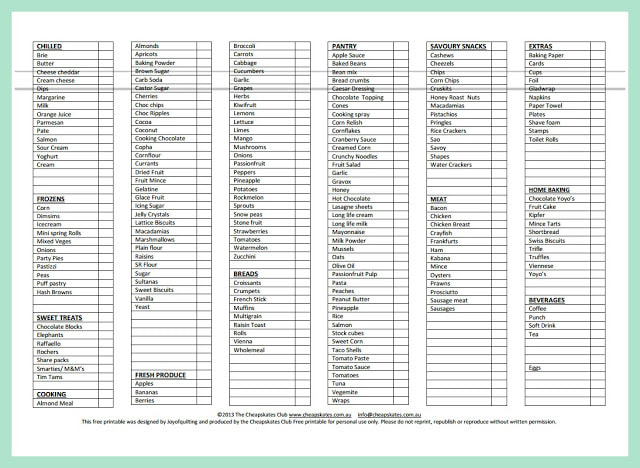
One question I get every year, usually just after Christmas, is do I think that the Christmas hampers available on the lay-by system are worth the money? And every year my answer is an emphatic no. Because when you break them down, they cost a lot more than the same items would if you were to source them yourself. When you MOO your Christmas hampers you choose what goes into it (you're not stuck with foods you don't like and will never use). You also get to choose when to buy those things (if you're smart you started with the non-perishables earlier in the year and bought them on half-price sale or even better, on clearance). And you choose how much of each thing to put into your hamper. Cheapskaters have their own methods of getting amazing Christmas hampers at rock bottom prices that have exactly what they want in them. If you're not familiar with it, I recommend the Joyco Hamper method. Joyofquilting is a long time Cheapskates Club member (she's also the inventor of Miracles Spray) and a few years ago she posted her template for her very own Joyco Hamper. Joy starts her Christmas grocery shopping early in the year, buying and stockpiling non-perishables and baking supplies and she uses her very detailed hamper template.
I usually start my Christmas/New Year grocery shopping in September and have it all finished when I do the November the shop. The bonus for me is that I buy enough to keep me out of the supermarket until it's time to do the March grocery shop the next year. Then the only things I buy are milk, eggs, bread and some fruit and veg, and only because I can't store enough of those things and keep them fresh for long enough. Why? Mainly because I loathe shopping in the heat and battling crowds during December and shopping during January doesn't appeal either - I want to enjoy our summer holidays. Having the Joyco Hamper template to work off helps me to remember to include the Christmas treats on my shopping lists. Things like ham, turkey, chocolate almonds, drinks, nuts, extra dried fruits, even the bon bons and candles for the table. And I can assure you my version of the Joyco Hamper doesn't cost anywhere $800, or even $400 a la the DIY version on the news. No siree! I budget $120 for our hamper and it includes all of the above, plus the extra veggies, serviettes, cheeses, dips, crackers, olives, pudding and cake ingredients and so on. Enough of my rambling, the point of this post is to share the Joyco Hamper template with you - just click here to download your copy.. As we Cheapskaters have been known to say, "make it your own". Use it as is or add or delete according to your needs. And smile as you shop for your Joyco Hamper because you'll be saving an absolute bundle.
0 Comments
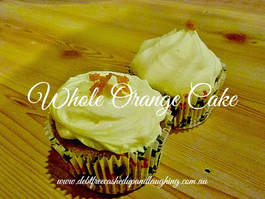
 Oranges are cheap at the moment, and the quality is excellent. Don't forget to check the label to make sure you are buying Australian oranges to ensure they are top quality and of course to support Australian farmers. This cake uses a whole orange and just four other basic pantry items, making it quick and easy. Whole Orange Cake Ingredients: 1 whole orange 1 1/2 cups sugar 3 eggs 1 1/4 cups oil 2 cups SR flour Method: Pre-heat oven to 180 degrees Celsius. Place the whole orange, sugar, eggs and oil in a food processor and blend well. Add sifted flour. Whizz until flour is mixed into orange mixture. Bake in a greased and lined loaf tin for 45 minutes until cooked. Note: Olive oil gives a very moist cake but can leave a “taste”. I like to use half vegetable oil, half olive oil. The result is a lovely moist cake without the taste of the olive oil. This is the original recipe as given to me. I have tweaked it somewhat to suit our eating habits, and the result is a delicious, moist cake, that is more nutritious. After all eating a healthy diet doesn't have to mean eating a dull diet. The recipe I now make swaps wholemeal spelt flour for the self-raising flour and unsweetened apple sauce for the oil. I also cut the amount of sugar in the recipe and replace one of the eggs with flax seed and water (a great egg substitute). The result is a very moist cake, almost a mud cake texture. I also bake it in cupcake papers just to make it go further. I get 24 large cupcakes from the recipe and they take approximately 18 minutes to cook, depending on your oven. I'd start checking them after 15 minutes. The cakes are done when a skewer inserted into the centre comes out clean. |
Archives
April 2020
Categories
All
|


 RSS Feed