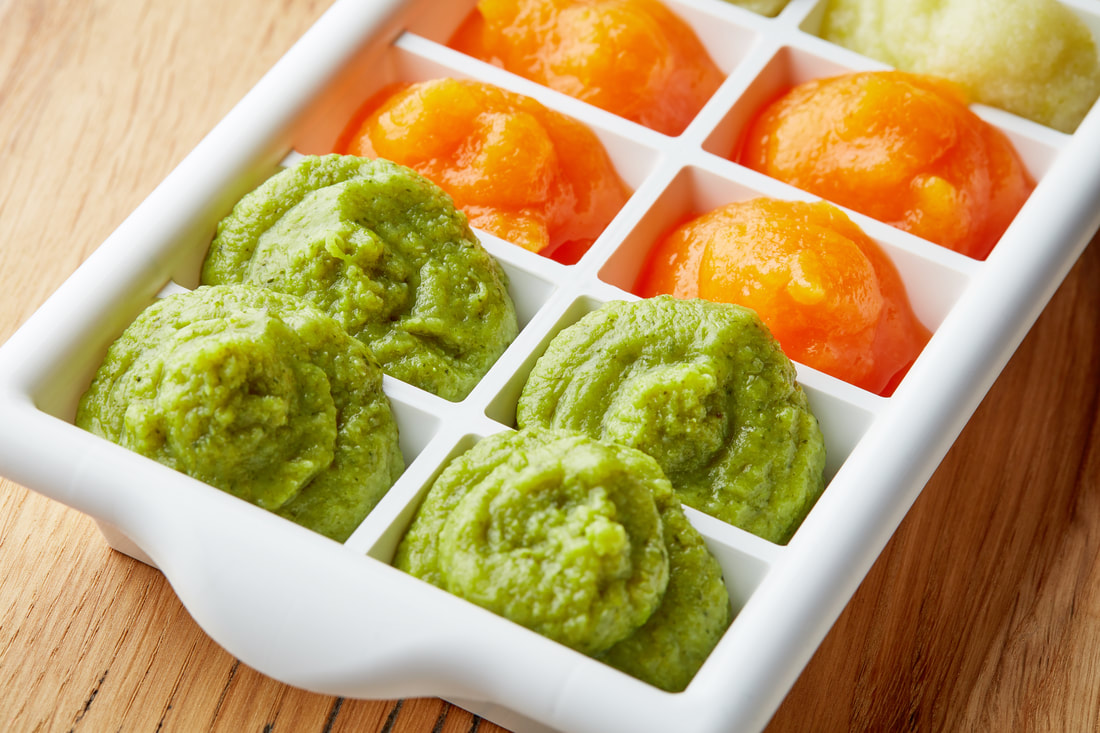
 Every household has at least one lurking in the freezer to the back of a kitchen cupboard. It may come out in summer, but once the weather cools down it's forgotten again.
The humble ice cube tray can do so much more in the kitchen than make ice cubes. Freezing your leftover food into cubes will save you a lot of money. Food cubes are all the rage at the moment (have you seen the frozen smoothie cubes and the frozen baby food cubes in the supermarket? Have you seen the price of them!) so save yourself time, and money and make your own with food you know you use. But how can you tell how much gravy or tomato paste or lemon juice is in a cube? Some measurements to make using your cubes easy: 1 regular sized ice cube compartment holds 2 tablespoons of liquid. 2 cubes is the equivalent of 1/4 cup of liquid 4 cubes is the equivalent of 1/2 cup of liquid 8 cubes is the equivalent of 1 cup of liquid Knowing this makes it easy to pull out the right number of cubes for your recipe.
1 Comment
Kathy Miller asks
"Just wondering what other Cheapskates think of cooking with frozen vegetables instead of fresh vegetables, is it a healthy option? Frozen vegetables are much cheaper than fresh but do they have as many vitamins?" If you have advice for Kathy, let us know in the comments below. We'll enter your answer into our Tip of the Week competition, with a one-year membership to the Cheapskates Club as the prize too. Dianne asks
"My husband and I have been married for five months, and are currently living with his parents. This is their wedding gift to us, so we can save as much as possible as a deposit on a home of our own. They offered us rent and utility free living for two years, which we are grateful for. The problem is grocery money (of all things!). Because of our work schedules, my MIL also does the grocery shopping and cooking (she's a great cook, I'm learning heaps) and we split the bill 50-50. Here's the rub: she does all the grocery shopping Coles and refuses to go anywhere else. She doesn't look for markdowns or specials, and flatly refuses to even consider generic brands. Last month our share of the grocery bill was $1,365 - even living rent free, we can't afford that! How can I , at 25 years old and a newlywed, tactfully introduce the idea of smart and frugal, budget shopping without any offence to my mother-in-law, who has been a housewife for 30+ years and has never needed to budget? Do you have the answer? If you can help Dianne let us know, by leaving it in the comments below. We'll enter your answer into our Tip of the Week competition, with a one-year membership to the Cheapskates Club as the prize. And keep an eye open, you may even see your answer in next week's newsletter. 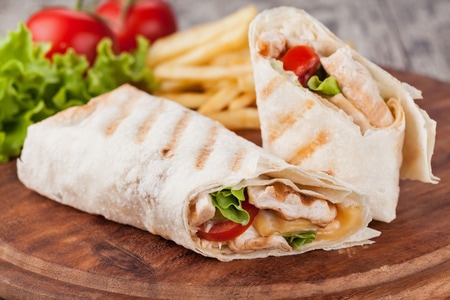 This topic came up again a few days ago, so I thought I'd revisit it here. Mountain Bread (that thin, flat wrap stuff) can be bought direct from Mountain Bread for 33% less than you buy it at Coles or Woolworths. If you order more than 8 packets (and no reason you can't - it lasts for just about ever, no preservatives and very little in actual ingredients, and it freezes) then delivery is free. There are a lot of different varieties. I buy wholemeal and corn. I use them for wraps, as lasagne sheets when I'm too lazy to make them, for quesadillas, to make "pita" chips and to make Australian sushi. We take them with us when we go camping, as fresh bread is hard to get in the bush. Being light and flat packed they store easily in the food drawer. They make great strudels when you don't have filo. I use three sheets, spread with melted butter, sprinkled with almond meal, and stacked. On the last layer i put stewed apple and sultanas, or apple and rhubarb, sprinkle with a little cinnamon and brown sugar, roll up and bake 30 minutes. Delicious with ice-cream. Use them as pastry sheets in the pie makers or quiche tins. Two sheets layered is great for sausage rolls when you don't have pastry. You'll find ordering info here You'll find the order form here (with prices and varieties). Lots of uses - if you have another one, please share it. This post has been shared from Debt Free, Cashed Up and Laughing
 If it's been a while since you cleaned out your cupboards, you may want to give your kitchen an overhaul before your next shopping trip. You'll be surprised at how much easier meal planning and cooking is when you have a tidy kitchen. You'll also be surprised at just how much money you can save too.
When your pantry, fridge and freezer are organized, you will stop over-buying. Using inventories will show you at a glance just how much food you have on hand and what you need to add to the shopping list. Here are some tips for organizing your food: · Check the food in your pantry for expiration dates; if it is past its prime, throw it out. · If an item isn't expired, but no one is interested in eating it, throw it out. Unopened items can be donated to family, friends or a local food bank. · Group like foods together; for example, store all canned foods in the same cupboard and all dry goods, such as rice and pasta in the same cupboard. Designate a shelf to baking supplies. Store flours, dried fruits, coconut and other baking supplies in air-tight containers to keep them fresh. If you put new packets into the freezer for 72 hours before putting them in the pantry you won't be bothered with pantry moths and weevils. If you have the freezer room they can be stored in the freezer in air-tight containers permanently. · Keep drink mixes, coffee and tea in the same area and keep breakfast cereals, breakfast spreads and other breakfast items grouped together. When you want something, you'll know right where to go to get it. · Keep regularly used items front and centre. You'll save time by not continuously searching, reaching and bending for these items. · If you pack a lot of lunches, designate a “lunch” shelf or cupboard. Place lunch bags, Ziploc bags, greaseproof paper, clingwrap, foil etc in a basket so they are all together and not falling all over the pantry. · When you start packing the lunch, you simply open the lunch cupboard, grab your lunch stuff and start packing. Of course, you'll need to walk over to the fridge to grab meats, cheeses, jams, fruits, and so forth, but having most of the items in one place will save you a lot of time. · Clean out the fridge each week. Leftovers have a short shelf life and you don't want to risk getting sick by eating something that should have been frozen or already been thrown-out. When you don't have any clutter in your way, you may find that you actually enjoy cooking for your family much more than before. Not only that, your grocery bill will go down considerably. |
Archives
April 2020
Categories
All
|
 RSS Feed