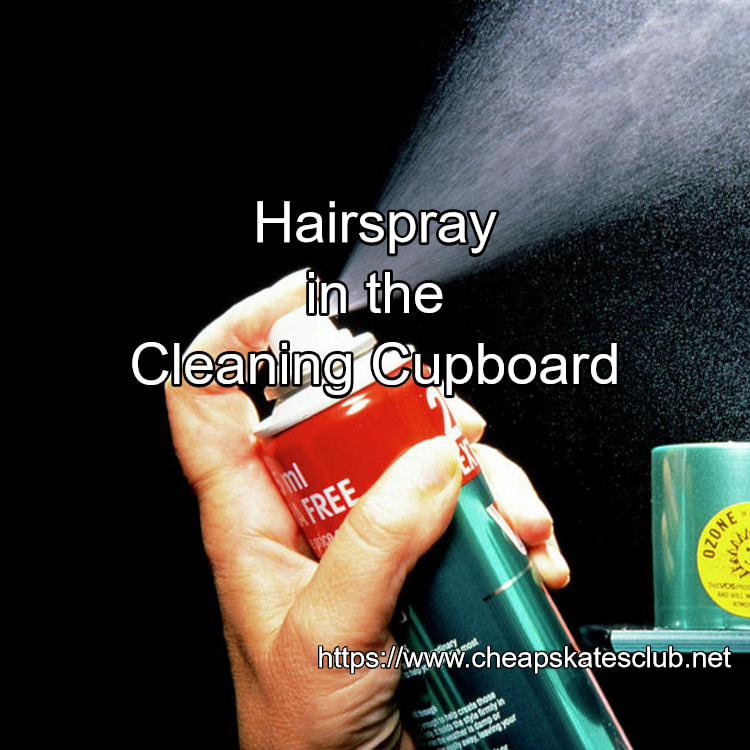
 Keep a can of hairspray in the cleaning cupboard. It will remove ink, marking pen, even the sticky residue left after stickers and labels have been removed. It can be used on clothing, walls, floors and furniture. You don't need to buy the expensive sprays you would use on your hair, the cheapest you can find will do the job. Just remember to do a test in an inconspicuous spot to make sure it won't take the colour or finish off whatever you are trying to clean.
0 Comments
 It may seem like a no brainer but it's a question I've been asked a few times so here goes.
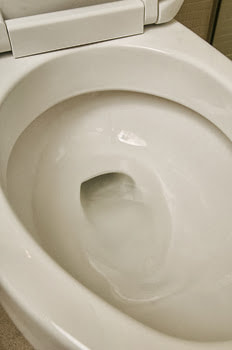
Cleaning the toilet really is as easy as slurp, brush, flush, just like the ads say. The difference when you clean the Cheapskates way is that you are not spending hundreds of dollars a year on stinky, over-powering, nasty-laden commercial cleaners. Instead you'll be using water, vinegar, bicarb soda and for stubborn water marks and hard water build-up citric acid. And a couple of cleaning cloths. That's it. Your whole toilet cleaning arsenal shouldn't cost you more than $10 for the year! Every Day Cleaning: If you clean your toilet daily (and if you have toilet training toddlers or little boys you'll need to clean at least daily) you won't ever need to deal with stains. It takes two minutes - really, I've timed it - to keep your toilet sparkling clean all the time. Step 1. Take 1 cup of white vinegar and pour it into the bowl. Use the brush to scrub the sides. Let it sit for about 10 minutes. Step 2. While the vinegar is sitting take your damp cleaning cloth and some vinegar diluted 50:50 with water in a spray bottle. Spray the cistern, seat and lid and around the outside of the bowl. Don't forget the pipes at the back if they are visible. Starting with the cistern and working down, wipe over the outside of the toilet, paying particular attention to the hinges around the seat. Rinse your cloth often. Step 3. Flush the toilet. See it sparkle. Vinegar is a mild disinfectant, you won't need to use anything else if you clean the toilet every day. For Stubborn Stains: Step 1. Sprinkle the bowl with bicarb soda, making sure you get it on the stain. Step 2. Pour 1 cup of white vinegar over the bicarb and while it is fizzing scrub with the toilet brush. Flush. For Hard Water and Mineral Stains: To clean a toilet with hard water stains and mineral build-up is an overnight chore. Step 1. Last thing at night flush the toilet. Pour 1/4 up citric acid into the bowl. Leave overnight. Step 2. In the morning put 1 cup white vinegar into the cistern. Scrub the bowl with the toilet brush, paying particular attention to the stains. Step 3. Flush. This will flush out the cistern and the bowl, leaving both clean and shiny. For Really Stubborn Stains: If the water stain or mineral build-up is particularly stubborn you'll need to go into cleaning over-drive. Step 1. Turn the water to the cistern off and flush. Then empty the bowl of water. You can use a cup or a sponge to do this. Step 2. Sprinkle 1/2 cup citric acid over the stains. Go away for half an hour. Step 3. Come back and using a scrub bud scrub that build-up. It should be disappearing before your eyes! Flush and admire your handiwork. If your toilet is particularly stained or the build-up is thick you will probably need to repeat this process a couple of times. Don't be discouraged, you will get rid of those stains and your toilet will sparkle. To Clean the Floor: This method is good for cleaning urine stains on the floor (common when toilet training). Step 1. Spray the floor with white vinegar. Step 2. Sprinkle with bicarb soda. While the mixture is fizzing use the toilet brush to scrub the floor, paying particular attention to the grout if you have a tiled floor. Step 3. Wipe it up with a wet cloth, followed by a damp cloth. Make sure you get all the mixture off the floor. There you have it. Simple, frugal and green ways to keep your toilet sparkling, clean and sanitary. It couldn't be any easier. 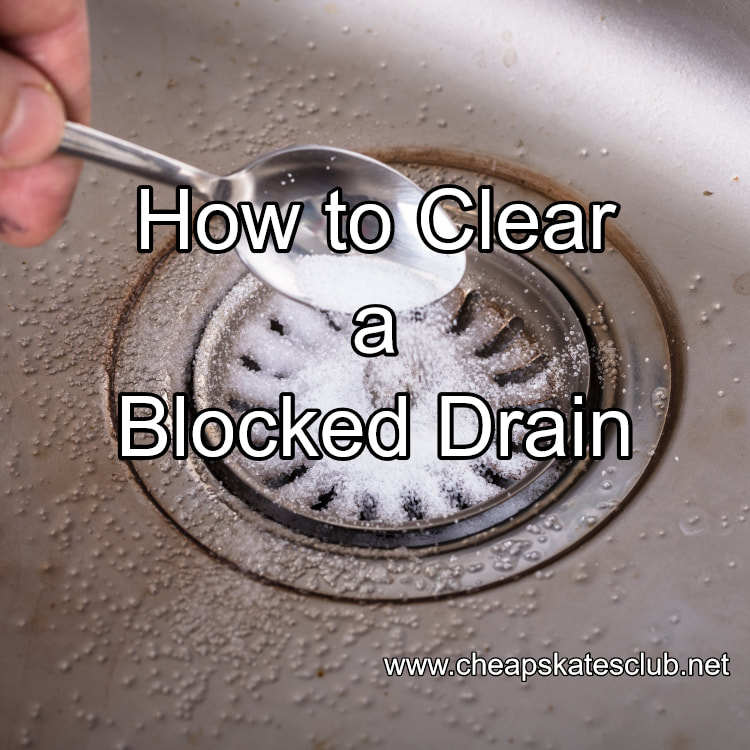 We've all seen it happen: we pull the plug and instead of the sink full of water whooshing down the drain it dribbles slowly, putting dread into our very souls. Before you call the plumber, try this DIY drain solution. To help dissolve grease and gunk in kitchen and laundry sinks and scum and hair in sluggish bathroom basin and bath drains, pour a mixture of 1cup of salt, 1 cup bicarb soda and ½ cup white vinegar into the drain. Put the plug in and leave it alone for 15 minutes. Then flush with a kettle of boiling water followed by flushing hot tap water down the drain for 1 minute. You can repeat this process if necessary. Keep your drains clean and clear with a monthly treatment.
Hint: Salt will keep small roots from taking up residence in your pipes.  There is a product available known as Stainless Steel Soap, designed to rid your hands of strong odours such as onion or fish or other unpleasant smells.
There is a cheaper alternative, readily available in any home, that works just as well to rid your hands of odours: stainless steel! Just rub your hands over the kitchen tap (or sink) while washing them and the odours will disappear. This works every time, without fail.  Click here toWhen our children were small they had a bath every night (or almost every night, sometimes they weren't dirty enough and I was too tired!). They loved their bath and would stay in it until the water was cold if I'd let them. Of course that meant that often there was a ring of gunk around the bath when it was emptied, a ring of gunk that I had to clean off.
Then a friend with triplets shared this tip with me and bathtime, or at least cleaning up after bathtime, became a breeze. Rhonda suggested smearing a light coat of any type of cheap shampoo around the inside of the bathtub and letting it dry. Don't put it on the bottom of the tub, as it will make it slippery. Doing this helps prevents that ring of scum from forming. If you have a ring around your tub at the moment, use a small amount of shampoo on a fine nylon net scrubber sponge loofah thingy. Rub around the ring and it will come off easily and your bathroom won't have that strong chemical odour after cleaning, either. edit.  Do you know what's lurking in the back of your fridge? Perhaps there's a science experiment or two growing on the bottom shelf or some leftovers waiting patiently at the back to be used up. You could even have some veggies wilting sadly in the crisper, ready to be used in a soup or casserole or even a good stock.
The only way you'll really know what is in your fridge, and how much money you won't be binning is to get that fridge cleaned, tidied and organized. To get started, fill your sink with hot, soapy water. Start with the Door 1. Empty the shelves. Put all the jars, bottles, tubes, individual sauce packs and anything else on the bench. 2. If the shelves are removable, take them off and wash them in that nice hot, soapy water and dry them thoroughly. If they aren't, get a wet washcloth and a tea towel and wash them thoroughly, wiping them dry as you go. Don't forget to wipe over the actual door panel. 3. Get a damp cloth and wipe over the seals, being sure to very carefully get into the seal proper, wiping out any crumbs and dust that have worked down into it. 4. Go through all those jars and bottles on the bench. Check the best before and use by dates. Anything past its use by, toss. Anything past its best before date, use your discretion. Anything you know you will never, ever use toss. Empty the contents into a bowl to go into the compost and put the containers in the recycle bin. Tip: If you have double (or even triple) bottles and jars of the same thing, check the best before date. On the jar that expires first, put a great big No. 1 with a permanent marker. On the jar that expires next, put a great big No. 2, and so on until all the jars are done. Now you know which jar or bottle to use first. As each one empties, put it in the recycle bin. 5. Put everything back, organizing as you go. Put sauces with sauces, all the salad dressings together, mustards together etc. The Fridge Proper 1. Start with the top shelf. Empty it completely. Remove it from the fridge and put it in the sink to soak. 2. Go through everything you have taken out. Anything you aren't sure of, compost. Put the jars, packets or tins into the recycle bin. 3. Wash and dry the inside of the fridge cabinet, don't forget the top. Unclog the drain if you have one in your fridge. Put the shelf back in place. 4. Repeat the process for the second shelf. 5. Take the crisper drawers out. Empty them, then wash and dry them thoroughly. 6. Any sad vegetables put aside to process for casseroles, stock or soup. Any science experiments add to the compost bowl. 7. Wash the sides of the fridge cabinet, paying particular attention the back and floor under the crisper drawers. These areas are notorious for catching spills and drips and hiding them until they are sticky, horrible messes. 8. Put the drawers back. Put the Food Back You'll have a pile and a half of food on your bench and it's time to get it back into your fridge. How you organize your fridge is up to you. I keep condiments, cream, sour cream, butter, eggs, cheese and containers of beetroot, pineapple and sun dried tomatoes on the top shelf. I use a lid from a Décor container that broke as a tray to hold the jam, cream, sour cream, cream cheese, mustards etc. together. The tray slides out easily so I can get what I want and it keeps the jars together. On the second shelf I keep yeast, yoghurt, shake-n-bake, dried fruits and any prepared meals or leftovers to be used up. On the third shelf are two Tupperware vegetable containers (full of vegetables) and blocks of cheese and butter that are waiting to be opened. I don't use the crisper drawers in our fridge for vegetables; they keep much better in the Tupperware. On the third shelf, left-hand side is a square container. In it you'll find blocks of butter and tasty cheese, tubs of sour cream and cottage cheese. Next to it is a Tupperware container of chopped vegetables, ready to be used. The small green container holds mushrooms or spring onions. In front of it is the meat thawing for tonight's dinner. In one crisper drawer I keep fruit: oranges, apples, mandarins, lemons etc. In the other crisper drawer I keep vegetables. I use Gel Bags to keep the vegetables in the drawers fresh until they are used. Organize your fridge to suit your family and the way you work. Cleaning the Outside Clear everything off the top of the fridge. Take all the pictures and photos and magnets off the door. Get a damp cloth and wipe it over. Pay special attention to sticky finger marks. Wipe over with a dry tea towel as you go. And you're done!  This is no ordinary run 'o the mill hamper - this is a Cheapskates Style Cleaning Hamper - the best gift ever for the practical people on your gift list.
It will come in at under $20. Cleaning Hamper - $16.10 You will need: 1 plastic bucket - 80c Laundry soap - $2.00 Washing soda - $4.00 Borax - $4.10 White vinegar $1.20 1 packet microfibre cleaning cloths $4.00 Cleaning Tips Grandma Used Cheapskates Washing Powder Print Tip Sheet. Pack all the items into the bucket, wrap with cellophane and tie in a bow with ribbon. You should find all the items at your local supermarket, but if you have time, you'll do better on prices for the microfibre cloths at $2 shops or even a hardware store. For the laundry soap, generic or store brand is fine. A box of four cakes is around $2.20, and you'll find it in the laundry aisle, usually towards the bottom of the shelves. Washing soda (or sodium carbonate) is from the laundry aisle. The common brand name is Lectric Soda, it's in a white packet with red writing on it. You may need to search for it, but it will be there. Borax is the mystery item on this list. Not all supermarkets keep it on the shelf, both my local Coles and Woolworths do, but you need to search for it. It's in the cleaning aisle, towards the pest control section. At Coles the brand is Bare Essentials, in a white tub with a pink lid. If you can't find it at the supermarket, don't despair. You'll get it at a hardware store, and definitely at Bunnings. For the microfibre cloths, if you have the time to zip into your favourite $2 shop, they'll be much cheaper than at the supermarket. If you're pressed for time, check the prices at the supermarket before you toss them in the trolley. Coles sell a pack of three - dusting, glass and kitchen - for $4, Simply Clean. And they're labelled so you know what their use is. 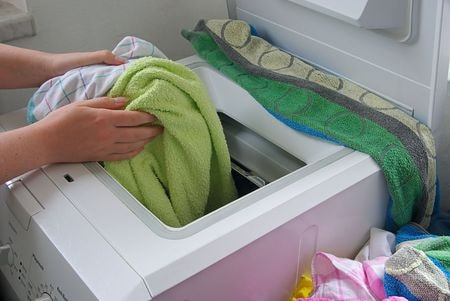 Today I'm going to go over how to clean my next favourite household appliance - the washing machine.
I wash every day except Saturday. Some days I do two loads a day to get bedding and towels clean, or those extra stinky sports clothes or like yesterday Wayne's super filthy, mud stained clothes from our day out on Sunday (he was on his back under a friend's four wheel drive a couple of times - and in a good shirt too!). My washing machine gets a good workout, but it is a newer HE machine and frankly I really do long for my old Hoover. It didn't need to be babied and coddled like this one does. A once-a-month clean kept it going for almost 30 years. My new machine needs to be cleaned regularly, it tells me when it needs to be done, and the process takes three hours and uses three loads of hot water. There is an easier, cheaper and much more energy efficient way to keep your washing machine clean and in tip top shape, and it works. It's the method I've been using for 26 years. First thing you need to do is find out if your washing machine actually has a lint filter. My HE machine doesn't, check your handbook to find out if your machine has a lint filter. If your washing machine is a top loader it should have a lint filter in the agitator. Pull out the top of the agitator and it should have some kind of little bag or basket attached to it. Gently take it off and give it a good clean. You may need to empty the lint out of it first. Then rinse it under hot water. If you use fabric softener then you will also need to soak it for a few minutes in white vinegar. Fabric softeners leave a film over the mesh that actually stops the water from getting through. You need to get rid of this build up. Front loaders have different lint filters - check your handbook to find out where it is and how to get to it. If you empty and rinse the lint filter after every wash you'll stop those black flakes of gunk that sometimes appear on your washing - that's the old muck out of the lint filter flowing back up into the bowl. Yuk! While the lint filter is soaking, get a cloth and a bucket of warm water and add a splash of vinegar (about 1 cup). Use this to wipe around the top of the bowl, under the lid, over the outside of the cabinet etc. Don't forget the inside of the agitator and the fabric softener dispenser. If it's particularly grungy, sprinkle with bi-carb and use this as a scouring powder. Just watch your fingers - the edges of all those ridges and rims can be sharp (guess how I know!). Put the lint filter back together and replace the top of the agitator. Then run your washing machine through a full cycle on the longest and hottest wash cycle (this is the only time I use a hot wash) and add a full 2 litre bottle of vinegar to it. Don't add any clothes or other detergents; let the vinegar work its magic. The vinegar will remove the scum and gunk and any hard-water build up in the bowl and hoses. Wipe over the outside of the machine with a damp cloth and dry. You washing machine will sparkle inside and out. Do this on a regular basis and you'll extend the life of your machine and save on costly maintenance calls. My handbook suggests every 100 washes, for me that's about every two months because of the amount of washing I do. For my mother it's every six months or so as she only does two loads a week. If your family is larger you may need to do this more often. It may seem like a tedious chore but it is worth taking care of this most useful household appliance. Think about what you'd do if you couldn't use your washing machine for a week - hand-washing, paying for the laundromat -and you'll see the benefit quickly. 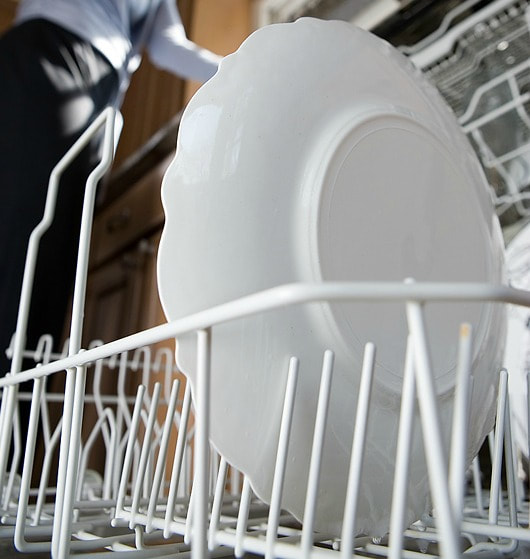 Step 1. Place a dishwasher-safe cup filled with plain white vinegar on the top rack of your empty dishwasher. The vinegar will help to wash away the loose, greasy grime, sanitizes, and helps remove the musty odour.
Step 2. Sprinkle a cup of bicarbonate soda around the bottom of the dishwasher. The bicarbonate soda will help freshen the smell of the dishwasher as well as brighten up the look of the inside of your appliance by removing stains. Step 3. Using the hottest water available, run the dishwasher through a cycle – except for the cup of vinegar, the dishwasher needs to be empty. Now that the dishwasher is clean and running right here are a few tips to keep it that way until the next cleaning. Run a bit of hot water in your sink before running the dishwasher. You will get cleaner dishes if the water starts hot. You can collect the water you run and use it to fill the kettle or for watering plants or other purposes. Run the water until what comes out of the tap feels hot. Make sure your water starts hot enough. Set the thermostat on your hot water service to 50 degrees Celsius. Water that is cooler than this won’t be hot enough to clean properly and water that is any hotter could scald. A routine dishwasher cleaning is a good habit to get into. Mark it on the calendar to do regularly each month, the same day you do the drains and the washing machine.  Today I'm going to go over how to clean my next favourite household appliance - the washing machine.
I wash every day except Saturday. Some days I do two loads a day to get bedding and towels clean, or those extra stinky sports clothes or like yesterday Wayne's super filthy, mud stained clothes from our day out on Sunday (he was on his back under a friend's four wheel drive a couple of times - and in a good shirt too!). My washing machine gets a good workout, but it is a newer HE machine and frankly I really do long for my old Hoover. It didn't need to be babied and coddled like this one does. A once-a-month clean kept it going for almost 30 years. My new machine needs to be cleaned regularly, it tells me when it needs to be done, and the process takes three hours and uses three loads of hot water. There is an easier, cheaper and much more energy efficient way to keep your washing machine clean and in tip top shape, and it works. It's the method I've been using for 26 years. First thing you need to do is find out if your washing machine actually has a lint filter. My HE machine doesn't, check your handbook to find out if your machine has a lint filter. If your washing machine is a top loader it should have a lint filter in the agitator. Pull out the top of the agitator and it should have some kind of little bag or basket attached to it. Gently take it off and give it a good clean. You may need to empty the lint out of it first. Then rinse it under hot water. If you use fabric softener then you will also need to soak it for a few minutes in white vinegar. Fabric softeners leave a film over the mesh that actually stops the water from getting through. You need to get rid of this build up. Front loaders have different lint filters - check your handbook to find out where it is and how to get to it. If you empty and rinse the lint filter after every wash you'll stop those black flakes of gunk that sometimes appear on your washing - that's the old muck out of the lint filter flowing back up into the bowl. Yuk! While the lint filter is soaking, get a cloth and a bucket of warm water and add a splash of vinegar (about 1 cup). Use this to wipe around the top of the bowl, under the lid, over the outside of the cabinet etc. Don't forget the inside of the agitator and the fabric softener dispenser. If it's particularly grungy, sprinkle with bi-carb and use this as a scouring powder. Just watch your fingers - the edges of all those ridges and rims can be sharp (guess how I know!). Put the lint filter back together and replace the top of the agitator. Then run your washing machine through a full cycle on the longest and hottest wash cycle (this is the only time I use a hot wash) and add a full 2 litre bottle of vinegar to it. Don't add any clothes or other detergents; let the vinegar work its magic. The vinegar will remove the scum and gunk and any hard-water build up in the bowl and hoses. Wipe over the outside of the machine with a damp cloth and dry. You washing machine will sparkle inside and out. Do this on a regular basis and you'll extend the life of your machine and save on costly maintenance calls. My handbook suggests every 100 washes, for me that's about every two months because of the amount of washing I do. For my mother it's every six months or so as she only does two loads a week. If your family is larger you may need to do this more often. It may seem like a tedious chore but it is worth taking care of this most useful household appliance. Think about what you'd do if you couldn't use your washing machine for a week - hand-washing, paying for the laundromat -and you'll see the benefit quickly. |
Archives
April 2020
Categories
All
|
 RSS Feed