|
Raspberry Jelly Pops 1 raspberry jelly 1 cup boiling water 1 cup vanilla yoghurt Dissolve jelly in boiling water. Cool for a few minutes. Add the vanilla yoghurt mix well. Pour into icy pole moulds, leaving 1cm at top for expansion. Freeze. Strawberry Banana Icy Poles Ingredients: 1 punnet strawberries, hulled 1 banana, peeled 1 cup apple juice Blend all ingredients until smooth. Pour into icy pole moulds and freeze. Fruit Salad Icy Poles 2 cups fruit salad 1 cup pineapple or apple juice Blend fruit salad and juice until smooth. Pour into icy pole moulds and freeze. Watermelon Icy Poles 2 cups watermelon chunks 2 cups orange or apple juice (or 1 cup of each) Blend until smooth. Pour into icy pole moulds, leave 1cm gap at top for expansion and freeze. Lemonade Icy Poles This was my mother's favourite icy pole - just plain old lemonade, frozen. Nothing else added, it really is refreshing and cooling. Simply fill icy pole moulds with lemonade. Leave 1cm gap at top for expansion. Freeze. Jam Creamsicles Fill an almost empty jam jar with milk. Shake until all the jam is off the sides and bottom of the jar. Pour into icy pole moulds and freeze. You can use any flavour jam, but we prefer either strawberry or raspberry. Pineapple Kiwi Fruit Icy Poles
4 kiwi fruit, peeled 1-1/2 - 2 cups pineapple juice Blend kiwi fruit and pineapple juice until smooth. Pour into icy pole moulds, leave 1cm gap at top for expansion and freeze.
0 Comments
You don't need to have a hot air corn popper to make fresh popcorn at home. You don't even need a microwave. You can easily pop popcorn the old fashioned way - in a pot with a lid on the stove! Popcorn popped on the stove has a smokier, much richer flavour and much less un-popped kernels than corn popped in a hot air popper or the microwave.
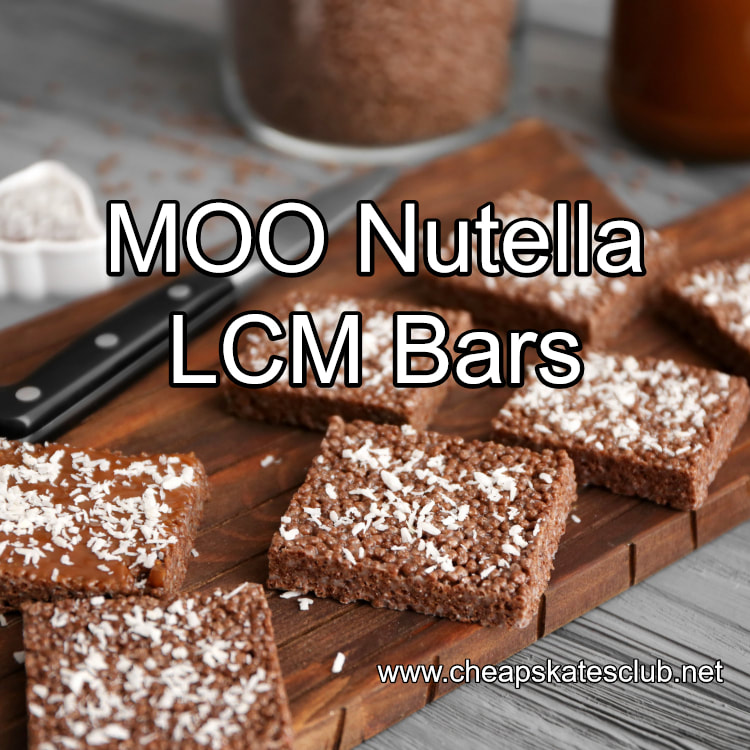
To pop popcorn on the stove: 1.Pour approximately two tablespoons of vegetable oil into the bottom of a large saucepan with a tight fitting lid. 2.Add enough popcorn to cover the bottom of the saucepan in a single layer. 3.Put the lid on and cook over a medium heat until you hear the first "pop". 4.Using the saucepan handle, carefully and gently shake the entire saucepan over the heat until the popping stops. Keep the saucepan moving or the corn will burn. 5.Remove from heat, take the lid off and tip the popcorn into a serving dish. Season if you wish to. To pop popcorn in the microwave: 1.Using a brown paper lunch bag, cover the bottom of the bag with popcorn. Make sure that the entire bottom of the bag is covered. 2. Fold over the top of the bag and staple it closed. Yes, the staple is metal, but it won't spark. 4. Place the bag in the microwave, lying down. 5. Cook on high until the popping stops. This will vary depending on how powerful your microwave is. I suggest that you start at two minutes and check. It may need another 30 seconds or so to complete the popping process. Popcorn Tips: Store your popcorn in the freezer. This helps all the kernels to pop. Buy your popcorn loose from your local wholefoods or health food store, rather than in packets from the supermarket. You can buy as much or as little as you need. Remember, 200g un-popped popcorn makes an awful lot of popped corn, a little goes a very long way. You can re-use the paper bag for microwave popcorn if you are very careful opening it. To add butter to freshly popped corn, melt the butter and pour it over the hot popcorn. Stir quickly to cover all the kernels. Caramel Popcorn Ingredients: 20 cups pop corn 2 cups light brown sugar 1 cup butter or margarine 1/2 cup condensed milk 1 tsp bicarb soda 1 tsp vanilla extract Method: Spread the popcorn in a thin layer in shallow, greased baking pans. Preheat oven to 120 degrees Celsius. Combine the brown sugar, condensed milk and butter in a medium saucepan. Stir to combine. Bring to a boil over a medium heat. Boil for five minutes, stirring continuously. Remove from the heat and stir in the bicarb soda and vanilla essence, beating well. The mixture should be light and foamy. Immediately pour over the popcorn. Stir with a fork to mix. Don't worry too much if not the popcorn isn't completely covered with the caramel. Place into preheated oven and bake for one hour, stirring completely every fifteen minutes. Remove from oven and empty onto sheets of baking paper. Break the caramel corn into bite size pieces. Allow to cool completely before storing in an airtight container. Variation: Bliss Bombs - add 2 cups unsalted peanuts to the popcorn before covering with the caramel mixture. Nutella and marshmallow - what a tasty treat! Buy the hazelnut spread and marshmallows on sale, use generic ricies and make twice the amount for less than half the price!
From the Cheapskates Club No Bake Recipe File Ingredients: 4 cups Ricies 1 small jar Nutella (or the equivalent brand) 2 x 200g pkts marshmallows 3 tbsp butter Method: Grease a 20cm square cake tin. In a large saucepan, on low heat, melt the butter. When the butter has melted add the marshmallows, stirring until they are completely melted. Turn the heat down to very low. Add half the Nutella, stirring until it melts. Add the remaining Nutella and stir until the mixture is smooth and everything has completely melted and combined. Pour in the Ricies and stir until well coated with the marshmallow mixture. Remove from the heat and quickly pour into the prepared cake tin. Press down with wet hands to smooth and firm the mixture. Put in the fridge to set. Once set cut into 20 squares to serve. Store in an air-tight container for 1 week. Karon writes "Hi Cath, I just got back from the supermarket where they were taste testing a new product from the dairy case. Heat and serve cheese on toast! Who would buy this item at nearly $4-00 a pack? Hence my tip. For years I have made subs and UFO's as snacks and soup accompaniments. All you need is stale long or round bread rolls. Cut in half lengthwise, spread with topping (recipes follow) and bake at 180°C for about 20 minutes.
Pizza topping: Mix 1 tbsp tomato sauce or paste with a cup of grated cheese and some diced bacon, shredded ham, salami, or strass. Ploughman's Lunch: 1 cup grated cheese, 3 chopped pickled onions, a little Worcestershire sauce. Chook and Cheese: 1 cup cheese, 1/2 cup leftover diced cooked chicken, a little steak sauce, mayo or mustard. Each topping will generously cover 6 roll halves. From the Cooking Tip Store This fudge recipe is really easy and uses pantry items too, so while it may taste extravagant, it's not really.
Ingredients: 500g icing sugar 1/2 cup cocoa 1/4 teaspoon salt 1/4 cup milk 1 tablespoon vanilla essence 125g butter 1 cup chopped nuts (we like almonds, but any nuts will do) Method: Mix all dry ingredients together in an 20cm microwave safe dish (important to use this size pan). Add milk and vanilla essence. Place chunk of butter in centre (leave butter as whole chunk, do not chop up). Microwave on high for 2 minutes until the bottom of the dish feels warm. Stir vigorously and blend in chopped nuts. Transfer to a greased lamington tray and chill for 1 hour. Use real butter for the best results. From the Sweets and Lollies recipe file Nuts’n’Bolts
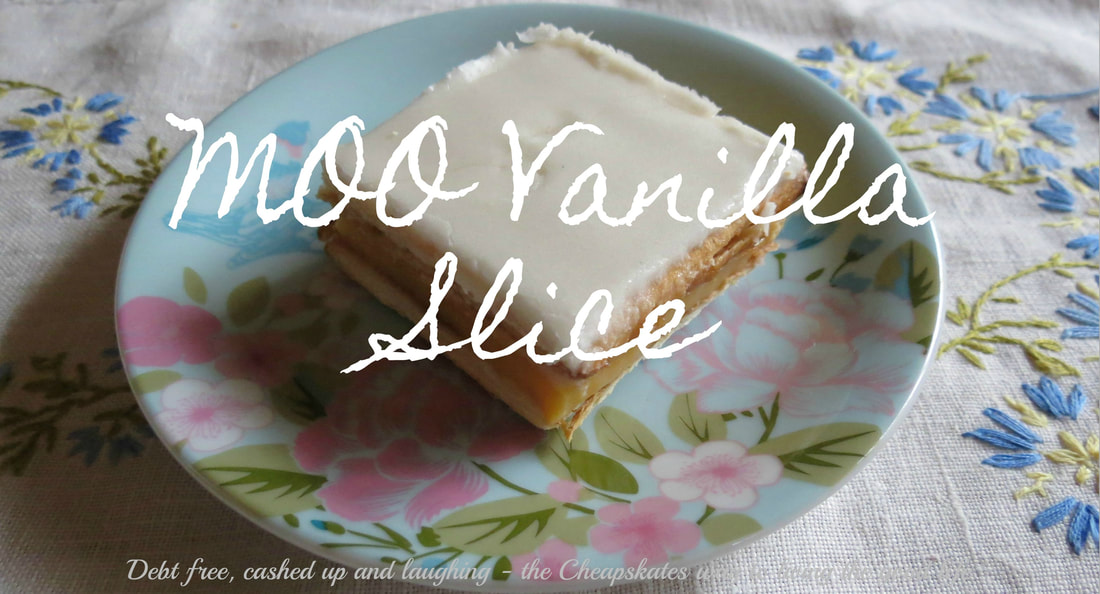
Ingredients: 500g Nutrigrain (generic equivalent works just as well) 375g salted peanuts 375g pretzels (broken into small pieces) 100g pumpkin seeds 1 packet Cream of Chicken soup mix 1 packet French Onion soup mix (generic works just as well) 3 tsp curry powder Pinch chilli powder 1/2 cup currants (or sultanas) 3/4 cup olive oil, heated Method: Combine all ingredients except oil in a large bowl. Mix well to make sure everything is coated with the seasonings. Warm the oil and stir through the dry ingredients, making sure they are all coated completely. Store in a large, air tight bowl. If you are going to jar it up for gifts, wait two days. Stir the mix completely each day then on the third day pour into jars and label. This mix looks great in nut dishes on the Christmas table too. If you don't have all the ingredients, don't stress. Add what you have, and substitute the rest. This makes a HUGE batch, so great for a few gifts, with plenty leftover for your Christmas snacks. Package it in jars or cellophane bags to give. I have no idea if the humble, but oh so very delicious, vanilla slice is an Australian creation or not, but I am more than happy to enjoy one every now and then. So last week when the topic came up in the Member's forum, and Coles had Lattice biscuits on sale, it didn't take too much encouraging to have me dragging out the slice tin, whipping up a custard and making a passionfruit icing. Because if it doesn't have passionfruit icing it isn't a real vanilla slice (a bit like neenish tarts that have white icing instead of pink - it's just wrong!). I'd love a passionfruit vine but we don't have the room so I had to resort to using a tin of passionfruit pulp. Of course that was way too much so the excess is frozen in ice cube trays. Anyway, back to the vanilla slice. I remembered my mother making the lattice biscuit vanilla slice when she was too busy to make the pastry from scratch so I wasn't at all worried about giving it a try. I did have to buy two packets of the biscuits though. You'll need a slice tray about 16cm x 26cm (or a Tupperware slice container works just as well). Line the tray with baking paper, making sure it comes up the sides so you have a "handle" to lift the prepared slice out. Place a layer of biscuits in the tray, shiny side up. Make a nice thick vanilla custard. Let it cool to warm then spread it over the biscuits. Place a layer of biscuits over the custard, shiny side down. Make a passionfruit icing. We prefer the icing to be reasonably thick so it sets quite hard (stops sticky fingers). Spread the icing over the top layer of biscuits. Place the slice in the fridge to set and chill, about two hours. Cut the slice into squares, using the edge of the biscuits as a guide. Make a cup of tea, use your best china and enjoy a fresh, yummy vanilla slice with your tea. MOO Vanilla Slice Ingredients: 200g packet Arnott's Lattice biscuits 1/3 cup custard powder 2 cups milk 1 tsp vanilla extract 1/4 cup caster sugar 1 cup icing sugar mixture 1 passionfruit, halved Method: Grease a 3cm-deep, 16.5cm x 26cm (base) slab pan. Line base and sides with baking paper, allowing a 2cm overhang at both long ends. Place 12 biscuits, in a single layer, in pan to cover base. Combine custard powder and 1/4 cup milk in a saucepan. Whisk until smooth. Pour in remaining milk. Add sugar and place pan over medium heat. Cook, stirring constantly, for 5 minutes or until custard comes to the boil. Continue cooking, stirring constantly, for 2 minutes. Remove from heat. Cover surface of custard with plastic wrap. Set aside for 30 minutes to cool slightly. Pour warm custard over biscuits. Top with another layer of 12 biscuits. Refrigerate for 1 hour or until set. Sift icing sugar into a bowl. Add 1 tablespoon passionfruit pulp. Stir to make a thick icing, adding more pulp if required. Spoon icing over slice. Refrigerate for 1 hour or until icing sets. Cut slice into squares, using shape of biscuits as a guide. Serve. This post has been shared from Debt Free, Cashed Up and Laughing
I LOVE this muffin recipe, because like it's name, it is always ready! Make up a double batch and keep it in the fridge for up to four weeks (I can guarantee it won't last that long). It makes oven fresh, warm muffins so easy you can surprise the family with an extra special breakfast in the same time you can set the table, get out the bowls, cereal and milk and sit down. If you don't have raw sugar, white sugar is fine, or half white, half brown works too. I've even substituted honey for the molasses when I've been out (you can get molasses in the health food aisle of the supermarket and use it to MOO brown sugar as well, it won't go to waste). Use vegetable oil if you don't have coconut oil (olive oil makes moist muffins, but can leave a heavy taste so half olive oil, half vegetable oil is good). MOO buttermilk is easy, and cheaper than buying it unless you already have it on your shopping list. Simply take two cups of milk, less two teaspoons. Stir in two teaspoons of lemon juice or white vinegar, let it sit for five minutes and you have your MOOed version of buttermilk. Always Ready Muffins
Ingredients: 3 cups rolled oats (not Quick Oats) 1 cup hot water 3/4 cup raw sugar 1/4 cup molasses 1/2 cup coconut oil (or butter) 2-1/2 cups wholemeal flour (or gluten free flour blend with xanthan gum) 2 tsp bicarbonate soda 1 tsp salt 2 eggs 2 cups buttermilk 1 cup dried fruit Method: Mix oats and hot water. Let stand 5 minutes to soften oats. In a separate bowl, cream coconut oil (or butter), sugar, eggs and molasses. Add oat mixture, bicarb soda, salt, fruit and flour alternating with milk. Store, covered, in the fridge up to 4 weeks. To cook: Fill greased muffin tins or cupcake liners 2/3 full (I use an ice ream scoop.) Bake at 200 degrees Celsius for 20 minutes or until a toothpick inserted in the middle comes out clean. Makes about 3 dozen. The beauty of this recipe is that you cook as many as you need and chill remaining batter for next time. Ingredients:
2 flour tortillas or Mountain Bread* 2 corn tortillas or Mountain Bread* 2 tomato & basil tortillas or Mountain Bread* 2 spinach tortillas or Mountain Bread* Nonstick cooking spray garlic salt onion powder chili powder Method: Preheat oven to 200 degrees Celsius. Put tortillas on a clean surface and spray with cooking spray, then sprinkle with seasonings to your taste. Flip over, spray and season the other side. Pile the tortillas up on a cutting board and cut into quarters using a sharp knife, forming 4 triangles. Put the cut tortillas on baking sheets, being sure not to overlap any. Bake in preheated oven until crisp, about 5 to 7 minutes. Remove from oven and slide off onto a cooling rack. They will get crisper as they cool. *Mountain Bread can be bought at your supermarket or online. You can order online from www.mountainbread.com.au There is a minimum order of 8 packets of Mountain Bread. If 8 packets sounds a lot Mountain Bread can be used for wraps, as lasagne sheets and in place of tortillas as well as making really nice chips. Bear in mind that it has a shelf life of 60 days, and can be frozen for up to 12 months. You can also share an order with a friend, delivery is free. From the October 2011 Journal |
Archives
April 2020
Categories
All
|


 RSS Feed