 There are lots of kitchen tools and gadgets around, most of them pretty gimmicky or only good for one particular function. Things like tea bag squeezers may seem useful and cute in the shop, but get them home and you really do wonder why you bothered.
One set of kitchen tools I couldn't be without however are my spatulas. I have 5, all different sizes and shapes and made from different materials. There's the Tupperware pot spatula, just perfect for beating a batter due to the cut-out in the centre. I'm not sure if they're still available, this one is about 20 years old (Tupperware just keeps on going doesn't it?). Then there's the soft plastic spatula that fits the curve of my favourite mixing bowls. It does a great job of scraping every last drop of cake batter into the tin. But my very favourites are relatively new. I have three silicone spatulas, all different sizes and shapes. They were a spontaneous buy, I hadn't planned on them at all. I was in Big W with Mum, looking for cookies sheets and we were checking out the silicone bakeware. The smallest is just perfect for scraping out cream bottles and jam jars. The medium size cleans a mixing bowl perfectly. The largest is spoon-shaped and ideal for spooning pancake batter into a hot pan and cleaning out large mixing bowls. And they are three of my favourite kitchen money-savers. It's amazing just how much cream is left in the bottle after pouring it out. I use the smallest spatula to get every last drop of cream out of the bottle, sometimes as much as 1/4 cup - that's around 35c that would have gone into the bin if I didn't scrape. We use one bottle of cream a week, so over the course of a year that's $18.20 I am not throwing away. With that one use alone the spatula has paid for itself many times over! I scrape out all jars - pasta sauce, peanut butter, jam etc. And when I open a tin of baked beans or tomato soup it's always scraped out too. Australians waste billions of dollars worth of food each year, and a lot of it is the food left in jars, bottles and cans. A spatula can help reduce that waste! Vegemite jars are never recycled until they have been scraped and then swished with warm water (not hot, it will explode) and used to make gravy. Peanut butter jars are scraped out for sandwiches and then swished with a little warm water that I add to a curry, stir-fry or satay dish for extra flavouring. Scraping the mixing bowl can get two extra cupcakes from a batter, that's around 40c that's not going in the bin. I even use a spatula to scrape the pot when I've made mash - with two hungry boys - sorry young men - to feed there's never enough mash! These little scrapes are all small, quite insignificant on their own. But add them up and it's hundreds of dollars a year that isn't going into the bin or into the supermarket's profits. I'm always asked how I keep the grocery bill so low, this is one of the main ways. I make sure we use every last drop of everything and don't throw good food out - that really is just money in the bin. My spatulas make it easy to save money. Shared from Debt Free, Cashed Up and Laughing
0 Comments
 I LOVE this muffin recipe, because like it's name, it is always ready! Make up a double batch and keep it in the fridge for up to four weeks (I can guarantee it won't last that long). It makes oven fresh, warm muffins so easy you can surprise the family with an extra special breakfast in the same time you can set the table, get out the bowls, cereal and milk and sit down. If you don't have raw sugar, white sugar is fine, or half white, half brown works too. I've even substituted honey for the molasses when I've been out (you can get molasses in the health food aisle of the supermarket and use it to MOO brown sugar as well, it won't go to waste). Use vegetable oil if you don't have coconut oil (olive oil makes moist muffins, but can leave a heavy taste so half olive oil, half vegetable oil is good). MOO buttermilk is easy, and cheaper than buying it unless you already have it on your shopping list. Simply take two cups of milk, less two teaspoons. Stir in two teaspoons of lemon juice or white vinegar, let it sit for five minutes and you have your MOOed version of buttermilk. Always Ready Muffins
Ingredients: 3 cups rolled oats (not Quick Oats) 1 cup hot water 3/4 cup raw sugar 1/4 cup molasses 1/2 cup coconut oil (or butter) 2-1/2 cups wholemeal flour (or gluten free flour blend with xanthan gum) 2 tsp bicarbonate soda 1 tsp salt 2 eggs 2 cups buttermilk 1 cup dried fruit Method: Mix oats and hot water. Let stand 5 minutes to soften oats. In a separate bowl, cream coconut oil (or butter), sugar, eggs and molasses. Add oat mixture, bicarb soda, salt, fruit and flour alternating with milk. Store, covered, in the fridge up to 4 weeks. To cook: Fill greased muffin tins or cupcake liners 2/3 full (I use an ice ream scoop.) Bake at 200 degrees Celsius for 20 minutes or until a toothpick inserted in the middle comes out clean. Makes about 3 dozen. The beauty of this recipe is that you cook as many as you need and chill remaining batter for next time.  Ingredients:
2 flour tortillas or Mountain Bread* 2 corn tortillas or Mountain Bread* 2 tomato & basil tortillas or Mountain Bread* 2 spinach tortillas or Mountain Bread* Nonstick cooking spray garlic salt onion powder chili powder Method: Preheat oven to 200 degrees Celsius. Put tortillas on a clean surface and spray with cooking spray, then sprinkle with seasonings to your taste. Flip over, spray and season the other side. Pile the tortillas up on a cutting board and cut into quarters using a sharp knife, forming 4 triangles. Put the cut tortillas on baking sheets, being sure not to overlap any. Bake in preheated oven until crisp, about 5 to 7 minutes. Remove from oven and slide off onto a cooling rack. They will get crisper as they cool. *Mountain Bread can be bought at your supermarket or online. You can order online from www.mountainbread.com.au There is a minimum order of 8 packets of Mountain Bread. If 8 packets sounds a lot Mountain Bread can be used for wraps, as lasagne sheets and in place of tortillas as well as making really nice chips. Bear in mind that it has a shelf life of 60 days, and can be frozen for up to 12 months. You can also share an order with a friend, delivery is free. From the October 2011 Journal 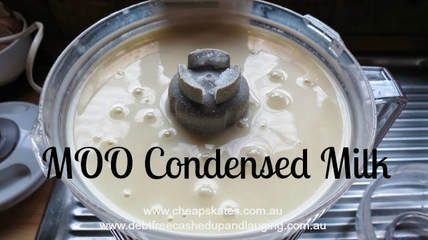 I've just been browsing the Coles catalogue for this week and notice that condensed milk is on sale for $2.50, save 70 cents. I was gobsmacked! It's obviously been a while since I bought condensed milk because the last time (I just checked my notes) it was $1.69!
I do use condensed milk quite often, in baking and to make Russian caramels, but I can assure you I wouldn't be if I had to pay $2.50, let alone $3.20, a can (and those cans are about 30g smaller than they were when they were $1.69!). MOO condensed milk has been a staple in my pantry for years. It's easy to make, tastes and works exactly like the tinned version and costs less than $2 to make more than double the quantity you'd be paing $3.20 for. Here's my go to condensed milk recipe - and don't worry about being able to store it before it goes yellow. It will keep in the fridge for at least a week, longer if you turn the container upside down. But it freezes! Yes, put any extra in the freezer until you're ready to use it in another recipe. MOO Condensed Milk Ingredients: 1 cup hot water 2 cups skim milk powder 2 cups white sugar 6 tbsp butter or margarine Method: Place all ingredients in a food processor and mix for about 3 minutes. The mixture will be quite thin, but thickens on standing for about an hour. Use immediately or refrigerate for up to one week. Can be frozen, thaw before use. Makes 3 cups. Seriously, it is so quick and easy to make and so cheap - why would you ever spend your hard earned dollars on tinned condensed milk? Shared from Debt Free, Cashed Up and Laughing  If you find yourself cooking a meal and realise you don’t have any garlic bread, then here's a cheap and quick way to make it!
1 – 2 slices of bread 1 – 2 tablespoons of olive oil Crushed garlic and herbs (adjust amounts to your liking) Simply spread the mixture on your bread and pop under the grill. Chop into small cubes for salad croutons! Contributed by Chloe Johnson From the March 2017 Journal  Have you priced veggie burgers from the deli or the chiller cabinet at the supermarket lately? They are expensive - over $3 each! This recipe makes six for less than the price of one. It's quick and easy too. Best of all you can make the patties ahead of time and keep them in the fridge until you're ready to cook them. They'll keep for two days covered in the fridge, perfect for those busy days.
We love them as burgers with salad and grilled pineapple, but they're good as a savoury part of a meal, hot or cold. If they're hot I make a gravy to go with them and sever them with sweet potato chips and broccoli (no idea why, did it once, everyone at it all so I've kept doing it) or cold with salads and a sweet chilli mayo. They're great for the end of your shopping cycle when veggies may be looking a little sad and limp - use them up and turn them into something delicious. Veggie Burgers Ingredients: 2 slices wholegrain bread, crumbled Several leaves of fresh Italian parsley, chopped 1/2 cup fine, dry bread crumbs, plus extra for coating 3/4 cup grated tasty cheese 1-1/2 tablespoons vegetable oil 3/4 cup finely chopped onion 1/2 cup finely chopped green or red capsicum 1/2 cup frozen corn kernels 1 clove garlic, minced 1/2 teaspoon chili powder (or less to taste) 1 egg, lightly beaten 1/2 cup solidly packed mashed sweet potato 1/3 cup ricotta 1/2 teaspoon salt 1/2 teaspoon pepper 2 tablespoons butter 1/4 cup plain flour Egg wash Method: In a medium-size bowl, mix together the crumbled bread, parsley, bread crumbs, and grated cheese. Set this aside. Heat the oil in a medium-size frypan over medium heat, then add the onion, pepper, and corn. Sauté the vegetables until soft, about 7 minutes, stirring often. Mix in the garlic and cumin and cook it all for another minute. Remove the pan from the heat and spoon the contents into the bread crumb mixture. In a large bowl, mix together the egg, sweet potato and ricotta. Add the bread crumb mixture, stirring thoroughly, then season with the salt and pepper. Flour your hands, then shape the mixture into six 15mm thick patties, using about 1/3 cup for each one. Dredge the patties in plain flour, then egg wash, then in bread crumbs and refrigerate them for about 1-1/2 hours. Melt the butter in a large frypan, transfer the patties to the pan and fry them over medium heat until they turn golden, about 4 minutes on each side. Remove them from the pan and serve right away. Makes 6 patties. Note: The crumbled wholegrain bread is essential to the texture, and prepared bread crumbs shouldn't be substituted. Put the bread slices out for about 30 minutes to air-dry, then crumble them by hand, with a serrated knife, or in a food processor.  Ingredients:
500g firm white fish 3tsp red curry paste 2tbp fresh Coriander leaves 2-3 Lime / Kaffir Lime Leaves 2 spring onions (include the green) Salt to taste Method: Pulse all ingredients in a food processor until smooth but do not puree. Take a dessertspoon of mixture and form a ball, flatten in the palm of hand to make fish cake. Heat 2 tablespoons of oil in frying pan. When hot, fry fish cakes for 1 - 2 minutes each side until browned and cooked through. Drain on paper towel. Serve with dipping sauce such as sweet chilli. 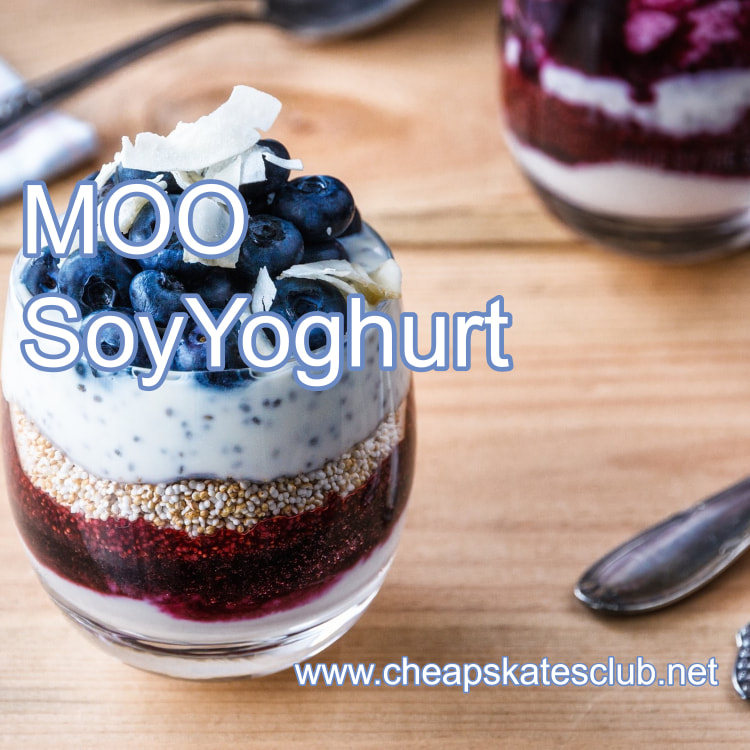 I have 2 young boys with milk allergies. As they eat at least 1 litre of soy yoghurt a week, I found a website that sells probiotic cultures for non-dairy yoghurt (Green Living Australia). I make one batch with the culture (with directions given) then use some of the batch of yoghurt as a starter made to make one more batch of soy yoghurt (using the cheapskates instructions). I make it using a vacuum pot and candy thermometer, and the long life soy milk.
Contributed by Cynthia Tay  Cupcakes, those old-fashioned childhood favourites are making a comeback, albeit in a much more glamorous form. Gone is the basic patty cake, covered in icing and hundreds and thousands. Instead in it's place are delectable confections of rich, buttery cake and colourful, flavoured icings beautifully decorated with flowers, sprinkles or cachous. There are whole shops devoted just to cupcakes, and they charge top dollar for each of these delicious treats. You can make your own cup cake confections at home for just a fraction of the price of the bought ones and I guarantee they will be every bite as good, if not better. Not a cake decorator? Neither am I. These days you can buy ready made cake decorations for just a few cents each, ideal for extra special afternoon teas or birthday parties. For everyday cupcakes you can use jelly crystals, hundreds and thousands, grated chocolate or honey comb, jelly beans, coconut - whatever you have on hand and your cupcakes will be gorgeous. Basic Cupcake Mixture Ingredients 250g sugar 125g butter or margarine 300g plain flour 3 eggs 1/2 cup milk 2 tsp cream of tartar 1 tsp bicarb soda Method Cream butter and sugar, add eggs one at a time, beating well. Add milk and then flour, bicarb and cream of tartar. Beat well. Place in patty pans and bake 10 minutes at 200 degrees. Makes 24 patty cakes. Variations Chocolate: add 3 tsp cocoa with flour Coconut: add 1/2 cup coconut to the mixture Strawberry: add 1/2 cup fresh or frozen strawberries to mixture Platinum members can login for full access to the Recipe File
Not a Platinum Cheapskates Club Member? Please upgrade to a Platinum Cheapskates Club membership to be able to access our Member's Centre. Click here to upgrade your Cheapskates Club membership today  Monte Carlos are an old Australian favourite, Arnotts sure picked a winner when they added these delicious coconut and raspberry cream biscuits to their Assorted Creams range. We Aussies buy them and enjoy them, but why? You can MOO Monte Carolos, really you can. And they are so easy; yet another thing we love that we've been conned into thinking we can only buy. So get out your mixing bowls and biscuit sheets, flour and butter and MOO them. And say "no" to buying these delicious biscuits because you can MOO them. This recipe was submitted by Bridie West, and it's become a favourite in our house. When you serve homemade monte carlos to visitors with their cup of tea they are suitable impressed - another thing we've been brainwashed into believing we have to buy. Cross them off your shopping list, get out the ingredients and have a go at making your own. I guarantee you won't ever want to buy them again (sorry Arnotts, but MOOing is better). The recipe makes about 25 biscuits and doubles really well also. Monte Carlos
Ingredients: 185g butter 1/2 cup brown sugar 1 egg 1 teaspoon vanilla 1-1/4 cup self-raising flour 3/4 cup plain flour ½ cup coconut Filling: 60g butter ¾ cup icing sugar ½ teaspoon vanilla 2 teaspoons milk raspberry jam Method: Pre-heat oven to 180 degrees Celsius. Line biscuit trays with baking paper. Cream butter and sugar until light and fluffy, add egg and vanilla, beat well. Add sifted dry ingredients and coconut, mix well. Roll teaspoonsful of mixture into balls. Put on lightly greased oven trays, gently press down with a fork. Bake 10 to 15 minutes or until golden brown. Remove from oven, cool on wire rack. While the biscuits are cooling prepare the filling. Combine the butter, icing sugar, vanilla and milk, mixing together until smooth. To assemble, put a teaspoon of jam and a teaspoon of prepared mock cream in centre of half the biscuits. Top with remaining halves, press together lightly. From 31 Days of MOO 2015 |
Archives
April 2020
Categories
All
|
 RSS Feed